 We respect your privacy. Your information is safe.
Introduction
Open source photography is my preferred, non-code based contribution to the open source community. While non-code contributions have been gaining prominence in the past few years, for some reason photography alludes mention.
As ways to not writing code to make a difference gain greater recognition and publicity in open source communities, photography's contributions are sure to grow and become more relevant.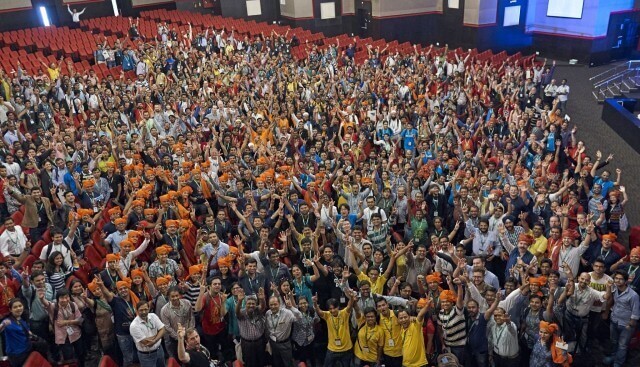
What's Open Source Photography?
Despite the search results, open source photography is not about open source photography software. It's about providing a tangible sense of community for something that's often hard to explain to grandmothers using only crayons.
By photographing open source communities and their members in action, we're enhancing camaraderie which ties them ever stronger to their community.
As open source community efforts are pictured, we help archive how the community has evolved and provide an essential connection to the people behind the project to the world as a whole.
Why I Shoot Open Source Photography
When I started out with photographing open source events, I didn't have any reason to shoot other than that I wanted the memories. However, over time, I realized that I wanted to use these captures as a way to give back in a positive manner.
For me, through open source photography, I'm able to help increase event, group, or projects awareness around the world and to let the open source communities know that they're cared about.
Beyond this, I found that open source photography was a new creative outlet for me, especially as I help open source communities have media materials to promote better themselves.
Got Kit?
A beautiful thing about open source photography is that anyone with an interest in doing it, no matter the equipment, can do it.
Despite the odd looks we get when using our mobile phones, I've seen amazing photos by talented artists using their cell phones that I've yet to accomplish with my pricier digital single lens reflex (DSLR) camera.
Essential Camera Equipment Needs
Don't worry if you've got a 3-year-old camera body (I do) and kit lens (sold it). Given your batteries are charged, memory cards are formatted, and the lens glass is clean; you've got the core equipment to start shooting events.
The basic camera equipment list is quite simple:
- Camera
- Lens
- Memory cards
- Batteries
- Lens cleaner
- Comfortable carrying case for the extras, snacks, and water
When shooting an event, I use a shoulder sling for my camera and a waist belt for the rest of the camera equipment. Years of experience has taught me that, a comfortable shooter leads to better shots.
Some events take a few hours while others take many days to complete, and I want to keep my energy going all throughout this time. By not having sore shoulders because of a heavy or awkward bag, I stay relaxed, rested, and more interested in keeping shooting.
Optional Camera Equipment
As you get into shooting events, you'll probably want to acquire more equipment; I know I did and still do.
One surprising thing I've learned is that I've gotten tons out of joining photographer communities and attending workshops. These opportunities for practice, critiques, and differing points of view have helped me improve far more than ever changing my camera body or lens has.
In fact, I'm currently more interested in buying studio lighting equipment to improve my staged group shots than the latest Pentax full frame and 24-70mm zoom lens. Also, don't purchase equipment if renting suffices and you know you need that stuff.
Find an Open Source Community to Shoot
If you're already part of an open source community with regular meetups, fantastic. You're already connected well enough to ask the simple question, "may I photograph the next meeting?".
If you're like me, often traveling, you can turn to keeping your Meetup.com interests and location updated four to six weeks ahead of reaching a destination. Alternately, I keep an eye on Drupical.com and WordCamp.org's schedule for upcoming activities.
Scheduling wise, major events are listed 6-15 months, regional 4-6 months, and local 2-6 weeks in advance. Because some group meetups are last minute thoughts, it's important to check their calendars weekly to ensure something of interest isn't bypassed.
In case I want to shoot a group, I'll kickstart the meeting by offering to do a presentation. Afterward, I'll shoot candids and a group photo. Some of my recent sharings have been on startup culture and when to select Drupal or WordPress CMS.
Event Shoot Preparation
Once I'm scheduled to shoot an event, I begin preparing for it. The following questions help me ensure a good shoot.
- Am I sure of when and where the meetup is?
- Who is my primary and secondary point of contact?
- How many people are attending the meetup?
- During the meeting start, how will I introduce myself and why I'm shooting?
- Have I reconned the meetup location for…
- Where to put additional equipment?
- Where will people be?
- What lighting is available?
- How will the light change during the event?
- Where to shoot the group photo?
- What equipment is needed…
- While walking about?
- For the group shot?
- Are my clothes appropriate for event and weather?
- How will I know who not to shoot?
The Event, the Event, Shoot the Event!

For the event itself, I arrive 30-60 minutes before registration opens or the meeting starts. At that time, I walk the event facility to answer last minute questions and in some cases, clean up the scenes.
When I say clean the scenes, I mean making sure that garbage is thrown away, chairs and mic booms aren't in the way, and cleaning whiteboards. These little things if not cleaned up beforehand, require post production effort to remove.
After the walk around and denoising, I'll then seek out the event leaders to remind them why I'm there and to recap their suggestions and needs.
Most often, they'll respond with something like…
- Introduce self
- Why are you shooting
- Who doesn't want to be shot
- Where can photos be found afterward
- Where & when for group shot
Wait, Wait, Don't Shoot Me!
Despite open source events being public affairs, some participants don't want to be photographed. Further, though most event hosts don't want to get into this subject, a don't shoot me indicator should be considered with the disclaimer that reasonable means to prevent photographic captures will be attempted.
A don't shoot me identifier could be a stripped versus solid lanyard or a big red dot on the name badge. Further, button or cord color coding might indicate the accepted photography level.
- Red - never shoot
- Yellow - ask to shoot
- Green - free to shoot
Lastly, I try and demonstrate respect towards those that are not wanting to be photographed, by not asking them why they don't want to be. Thier reasons are beyond my concerns.
Camera Setting Suggestions
While my camera's green mode typically does a good job, I too often get unexpected results. As such, I've learned to set a baseline for event photography while not being burdened with details or settings.
My baselines are from my experience of using and experimenting with my equipment. As such, they're probably not suitable for you. To that end, here're my suggested starting settings.
Auto-, action-, or green-mode OR Shutter speed priority at 1/125s
The idea is to stop image movement while still capturing enough light to see details clearly.
Spot metering
Where you focus, is where you are metering for light. So while the background or foreground might be over- or under-exposed your subject isn't.
Continuous autofocus
For greater benefits, use back-button focus combined with continuous-focus mode to separate focus and shutter clicking activities. Your image keeper rate will improve.
Shoot RAW or RAW w/JPEG
However, if you don't post process photos or don't have much memory card space, shoot JPEG only.
My Manual Settings
Though I prefer shooting in manual mode, I find that shutter priority mode gives me a greater chance to capture split-second moments at events. If you want to give manual mode a try, here are my ballparks.
Indoor Settings
Lit to dim room lighting.
- ISO 400-3200
- f/2.8-f/5.6
- 1/90s - 1/180s
Specifically, for an okay lit indoors with my Pentax K-5ii and Sigma 18-35mm f/1.8; ISO 800, f/2.0, 1/125s, and exposure -0.5 is my baseline.
Outdoor Settings
Bright to cloudy lighting.
- ISO 100-400
- f/8.0-f/13.0
- 1/125s - 1/250s
For a noon, high-sun, but cloudy 300-person outdoor group with my Pentax K-5ii and Sigma 18-35mm f/1.8; ISO 200, f/8.0, 1/125s, and exposure -0.5 were FOSSASIA's 2016 official group photograph settings.
I'm the Art Director
In being an event photographer, I've found there's a certain amount of implied authority granted to you. This power is great for politely directing people to get the shot list completed.
In reality, this means setting expectations with our event attendees like how to sit, stand, lean, do, and button up their shirts. If you need to fix something to get the shot, adjust with kindness.
The Shot List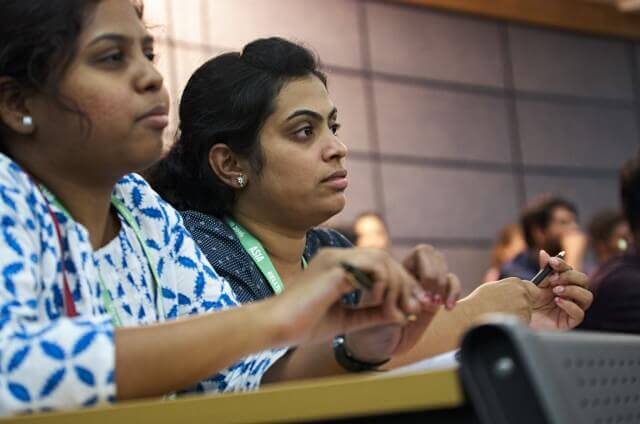
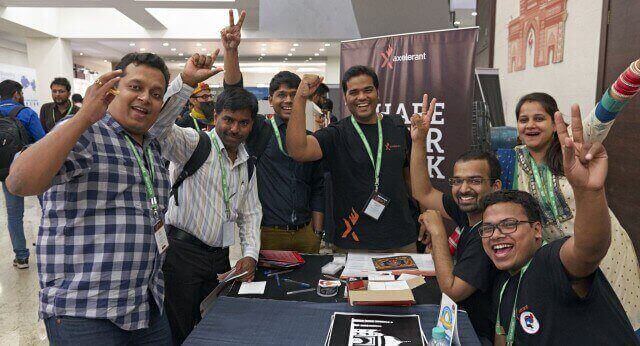
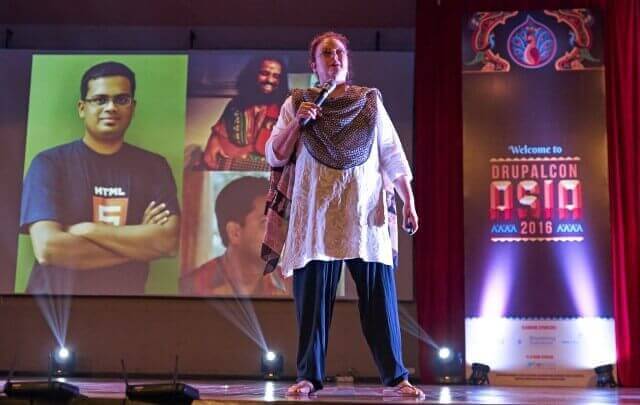
Per event host feedback, anything that's related to the open source event is a good subject to capture. Therefore, we're free to shoot as few or many topics we desire based upon the following:
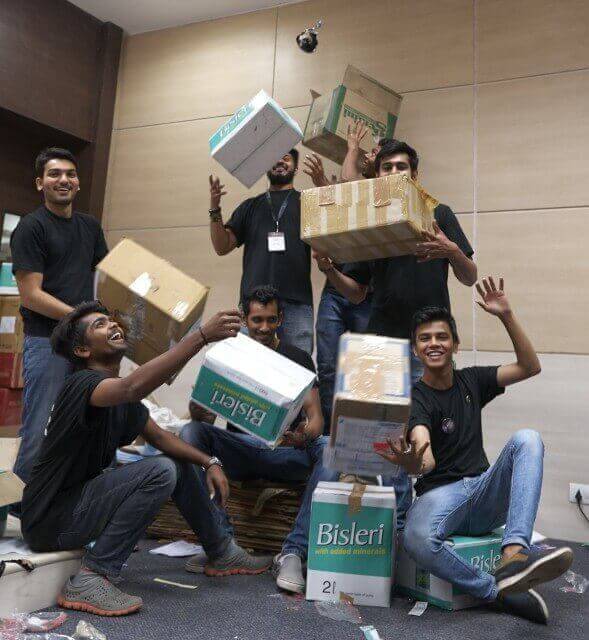
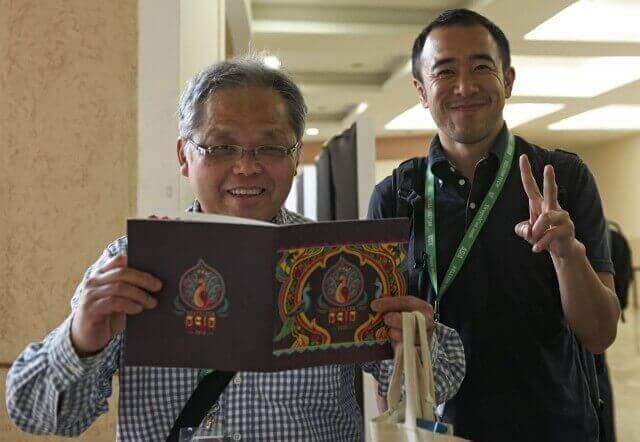
- Birds of a feather
- Candids–avoid people eating
- Flashmob
- Group photo
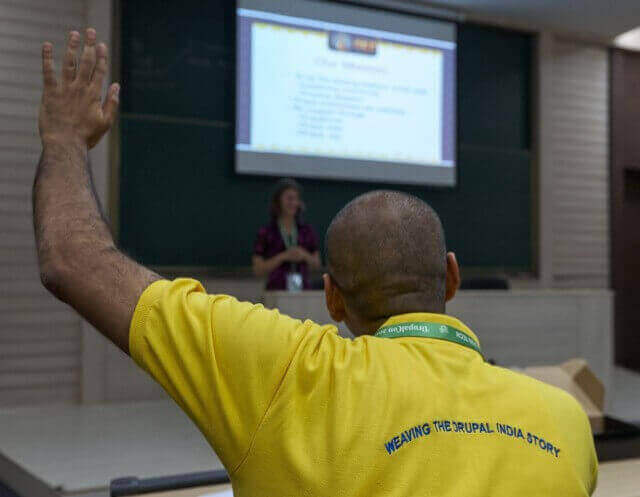
- Keynote
- People holding up event stickers
- People mentoring during sprints
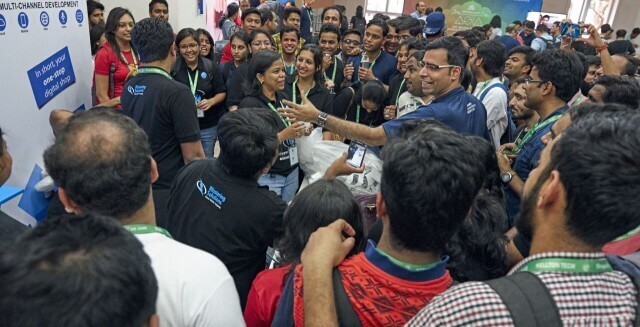
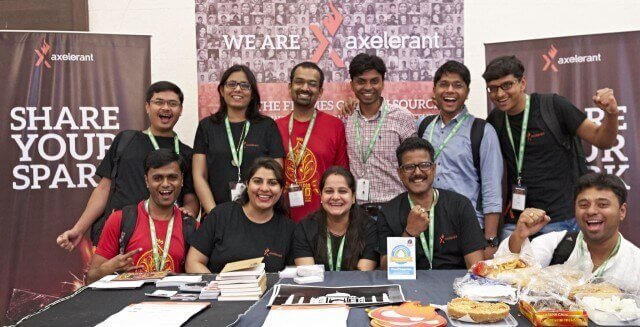
- People talking with booth exhibitors
- People wearing community shirts
- Prenote
- Q&A
- Registration desk
- Session speakers presenting
- Sprinter group shots
- Staff and volunteers
- Support desk
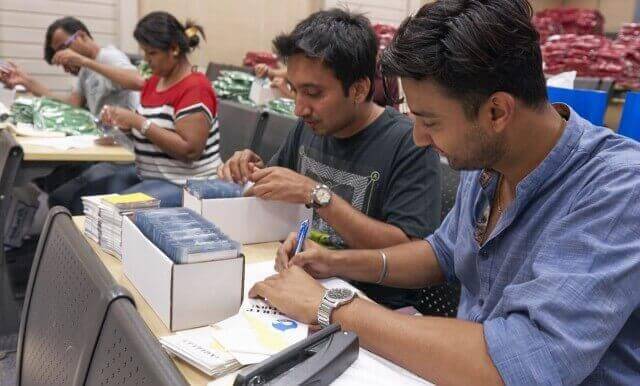
- Training–people talking and coding
One oft hard-earned caveat of being the photographer…
Never stand around looking bored. If you’ve run out of guests, shoot the food, band or signage.–Gina Milicia, professional photographer
Special Requests–The Shot List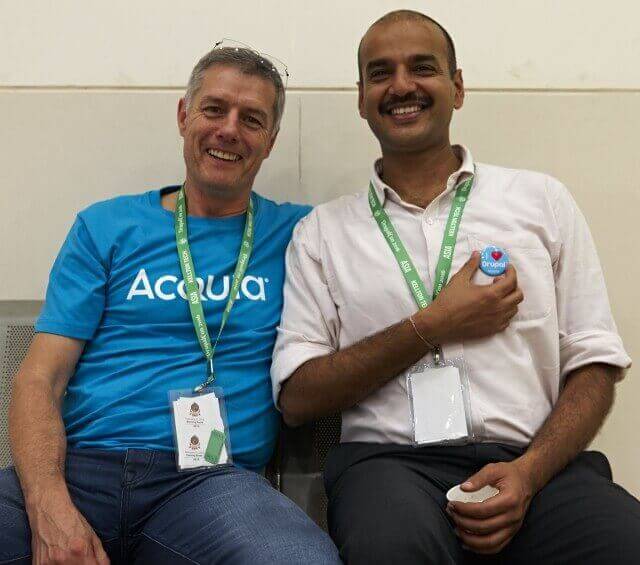
Sometimes, event hosts have media or stakeholder needs that lead to special requests as part of the shot list. Getting these shots only takes an extra moment of directing your subjects as needed.
- Shoot with as much racial and gender diversity as possible.
- Shoot groups with particular branding.
- Include event branding in shots, even stickers on laptops.
- Shoot photos to allow space for media content.
I simplify getting brand shots by keeping event swag on hand, like stickers and buttons, to give people to hold, wear, or stick someplace.
When shooting photos for ads or like media, I try not to keep subjects strictly in the middle of the frame. Often I'll put people to one horizontal or vertical side or another. While I can always crop an image, I'm not always able to create copy space.
Getting the Shots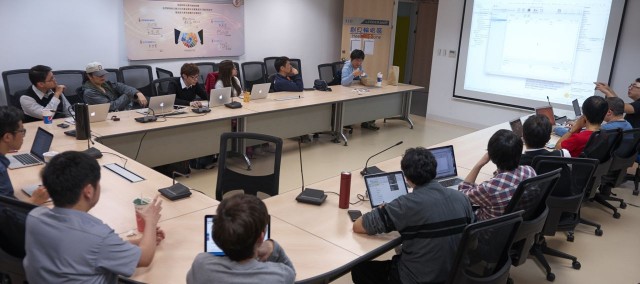
Despite how much I've covered so far, there's still a few more tidbits to share. The reward?
All of this forethought and planning will let you shoot freely once you begin.
To increase my chances of covering the event's entirety, I'll walk the facilities in a looping or figure-eight like pattern. I'll move from session to session, spending about 5-10 minutes shooting at each before wandering to the next.
Every couple of hours, I'll take a break to take care of myself: bathroom, water, food, and quickly selecting photos for social media sharing. This way, I'm always feeling ready to shoot, even at day's end when others are dragging.
Finally, while walking the event, I think of the shot list as concepts with simple, consistent steps for candids, sessions, chokepoint, and small & big group. These steps or processes are outlined below each photo sample.
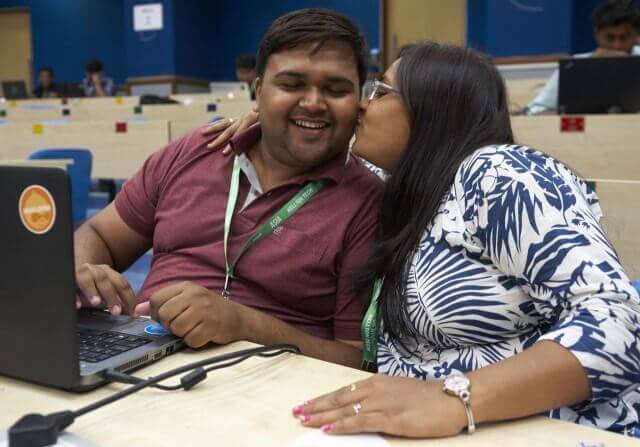
Candids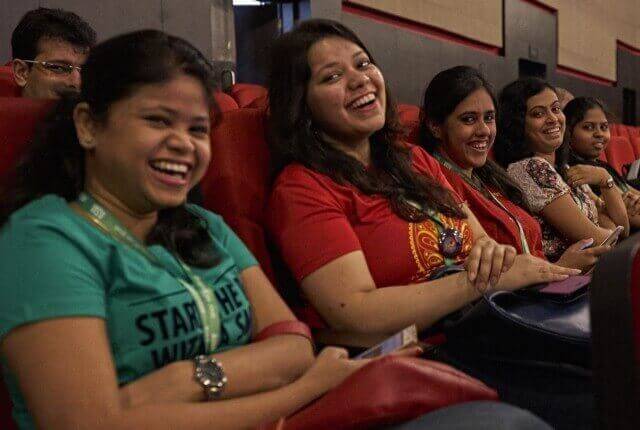
- Subject Aware
- Smile
- Wander around
- Chat with folks
- Ask for a photo
- Direct/Fix/Pose/Energize
- Moo & Snap
- Thank
- Share preview
- Repeat
- Subject Unaware
- Smile
- Wander around
- Chat with folks
- Frame image
- Snap
- Repeat
Sessions
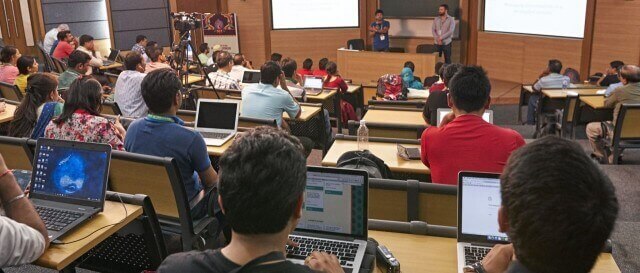
- Smile
- Stay unobtrusive
- Minimize interruptions
- Have patience
- Shoot story
- Shift location
- Repeat
Chokepoint
- Find an interesting background
- Remain discrete
- Wait for subjects to make the scene
- Shoot
- Repeat
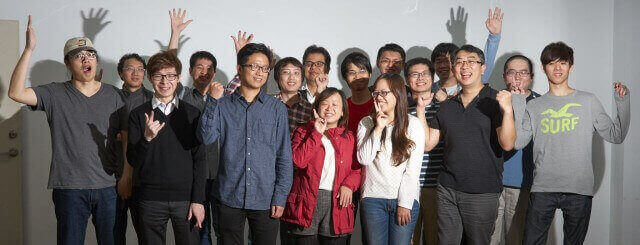
Small group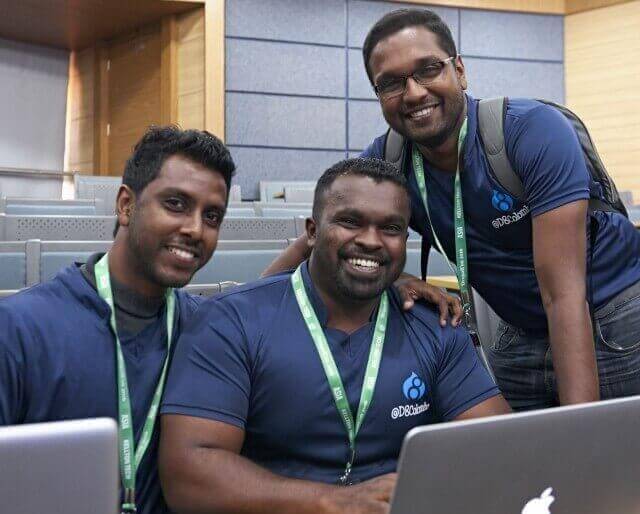
- Like candids, but shooting 2-5 people together
- Set expectations
- 3-5 photos to increase chances of one coming out.
- Keep group’s attention using a lowered or excited tone while shooting
- Share a preview
Big group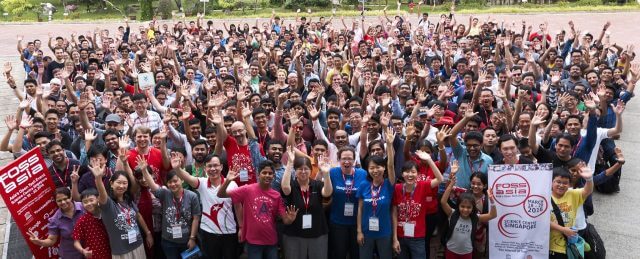
- Set expectations
- 10+ photos to increase chances of one coming out.
- 2-3 kinds of group shots
- Standing generally
- arms crossed
- alternate facial reactions
- jazz hands
- Remind if they can’t see the camera or the light, it can’t see them
- Direct people around
- Keep group’s attention using a lowered or excited tone while shooting
- If possible, share a preview
The Event is Over, Now What?
I used to think that once an event is over, my life got easier. It doesn't. There's still a good amount of work to select and share my best images.
In fact, there seems to be about an hour of effort needed for every three hours of shooting, plus one. ;) However, these next steps are simple stages that can be spread out, given they're kept in sequence>
- Culling
- Post-production
- Metadata
- Sharing
- Prepare for next shoot
Here's why I go through this extra effort…
You're only as good as your worst photograph.–Peter Hurley, Headshot Photographer
I Don't Share All of My Images
I want to be considered a good photographer. Surprisingly, the answer isn't in sharing more images, but by only sharing my best efforts. Through learning to cull, select, and critique my photos, I've learned more about my style and how I'd like to improve it.
A good portfolio is 20 images. A great one contains 5.–Anonymous Photographers
Culling Images by Ratings
I find culling or selecting images to keep and share a very personal thing. However, when I'm faced with deadlines and loads of pictures, I have to pick the good stuff fast and consistently so that I'm able to shoot more.
I identify images to keep or not using a zero- to five-star image classification. The following is how I tend to assign star ratings to images.
My star rating meanings
- Zero star images, mean that it's a non-keeper for whatever reasons I feel.
- One star images are considered unshared, sentimental or reference keepers.
- Two starred "others will like them" images, are saved for article writing and other filler purposes.
- Three starred "I consider these good" images, get shared via social media channels like Facebook and are published in my Flickr albums.
- Four starred "I'm proud of this shot" pictures, go into my personal picks album.
- Five starred images are so right that Magnum Photos is calling me tomorrow.
Rate Consistently & Quickly Without Regret
I start ranking images by looking at all of them, oldest to newest, one at a time. If I like the picture for some reason, I add one star.
Rarely will I bump an image more than one star at a time. The idea is to let the image's worth evolve organically rather than set the final image rating right away.
After working through all of the unrated images, I move onto reviewing all of the one starred images. As I view the individual one starred images, I'll add or remove a star for whatever reason or whim.
Once through the one-starred pictures, I'll repeat these add or subtract star steps for my two-, three- and five-starred images.
Afterward, I'll work my way back down the ratings to validate the choices.
Once I've completed the one-starred image review for the second time, I'm all done with the rating.
Well… almost done…
How I pick that one picture out of many alike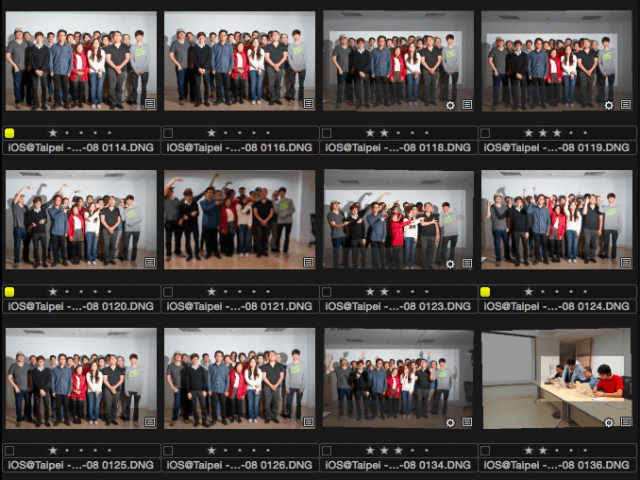
Honestly, this is the hard part of image selection. The follow list is of my rating refinement criteria amongst similar images.
- Facial expressions; minute or major
- Subject looking at or away from camera
- Engagement of the topic in the environment
- Fewer environmental distractions
- Blurred, soft, or sharp focus on purpose or not
- Personal gut feels for liking something despite not being able to express why
Rated image results
Through this consistent manner of evaluating pictures and getting ever more critical of what I consider good, I find that there're proportionally fewer highly rated images than lower.
In fact, there's an almost consistent percentage range found for rating distributions. These rates also apply to my non-open source photography event shoots.
- Zero stars; 69-83%
- One star; 10-15%
- Two stars; 5-10%
- Three stars; 2-5%
- Four stars; 0.1-0.25%
- Five stars; no idea, never recognized one yet
Through this information, I know that I'll probably only like two to five shots for every 100 taken. Next, if I need to improve my portfolio, I am aware that it might take 1,000 shots to get a keeper.
Profoundly, most images are destined for the trash bin. This even fits into my life philosophy, if I'm not interested now, I'm probably not going to be in the future, so why to be burdened down by probabilities.
Post Production of Images
Once my images are rated, I'll take a backup of them and then delete my zero-starred pictures.
At this point, a two global updates are applied to the pictures.
The first comprehensive update relates to baselining metadata such as my copyright, rights usage, name and contact details, shot location, and providing a generic headline and description. An example follows.
- Copyright
- © 2016 Michael Cannon
- Rights Usage
- Attribution-ShareAlike 4.0 International
- Keywords
- FOSSASIA, Open Tech Summit, Open Source, IoT, Open Hardware, Asia, Singapore, Science Hack, FOSS, Community, IT
- Photographer Contact
- Michael Cannon
- michael@peimic.com
- +1 617 539 6072
- Shot Location
- Science Center Singapore
- Singapore
- SG
- Generic Headline and Description
- FOSSASIA 2016 - Singapore
- http://2016.fossasia.org/
The second global update is to apply auto-levels for my images with two-stars and higher. By doing this, I've let my Capture One photo editing software to speed significantly up my productivity.
Not too much post-production
Once I've completed the global updates, I'll begin working post production on my highest rated images first. This means that my five-, four-, and three-starred that matter get worked on before I'll ever consider the one- and two-starred images again.
The higher rated images, get the most post-production effort as shown by my following guidelines.
- One star; no post processing.
- Two stars; auto-levels.
- Three stars; like two stars, but with attention to cropping, curves, clarity, exposure, vignetting, white balance, etc.
- Four stars; like three stars, but with local & 100% view detailing.
- Five stars; like four stars, but with extra love and affection.
Once I've delivered the needed event photos, I may go back to the four-star and above images and tune them further for my Flickr portfolio.
Where Do Images Go?
Once post-production of my open source photography set is completed, it's time to share. Depending upon with whom I'm working with, I'll submit the photo set to a Flickr album or towards a larger marketing effort.
Typically, pushing the event photos to a Flickr album and then sharing that collection URL via a Meetup page comment suffices for making the event hosts happy with my efforts. Also, by pushing my metadata tagged photos onto Flickr, other agencies and organizations can find and reuse my images in their content AKA free advertising.
Lastly, for some events, I'll share images with the facility providers, caterers, and all those involved in producing the event or meeting. They greatly appreciate them and in turn, can provide me with new opportunities to shoot elsewhere.
Got a photo release?
A word of warning, based upon experience. If you take pictures that you'd like to sell, whether directly or via a service provider like Getty, you must get media releases from the subjects or models contained within the image frame. If you don't, you're breaking the model's trust and the law.
Open Source Photography Recap

Thank you for sticking with me in learning about making open source photography possible. Here are some reminders before I get trigger happy again.
- Our photos provide historical and engaged context to those interested in joining open source communities.
- For the people within the pictures, it's about feeling a part of the community and sustaining positive memories.
- For those we want our open source communities to affect, it's about making the intangible, tangible.
May good light favor your subjects!–Me
References
- Camera lenses for indoor event photography: fast glass
- Concert photography tips
- Organize and photograph events like a pro
- Shot types and angles
- Shot with Michael at DrupalCon New Orleans
This article was originally published February 17, 2016. It has been updated since then for clarity.

Michael Cannon, Chief Success Officer
Adventurous pegan water-rat, Drusus & Jace's smiling baba, social impact photographer.