Introduction
Automation testing comes in many forms for functional testing and regression testing, but how do we achieve visual regression testing? Let’s talk about a test technique which automates visual testing. These test tools open the web page using a headless browser and verify that specific elements on the page—like blocks, images, colour codes, etc—are exactly the same as expected, and also take a success or failure snapshot. To achieve our goal of visual regression testing, we chose PhantomCSS.
What is PhantomCSS?
PhantomCSS is used for Visual Regression testing. It is an open source Node.js tool and built upon three components: PhantomJS, CasperJS and Resemble.js.
- PhantomJS: This is the headless browser for page automation, and is required for capturing screenshots of the web page under test.
- CasperJS: Navigation actions for the web page are written in CasperJS. CasperJS interacts with PhantomJS to execute these actions.
- Resemble.js: This is the comparison buddy used to compare the current screenshot with the baseline screenshot.
So how does PhantomCSS perform visual regression testing? That’s easy—it runs as a headless browser and opens the web page, takes a screenshot of the web page or any specific element of the page, compares it with a baseline image and gives the output based on the comparison.
On executing the test for the first time, PhantomCSS takes a screenshot and saves it as the baseline image. Creating a baseline image is important, as it is used to compare results in future tests. When there is any change on the website, run PhantomCSS again, and it takes a new screenshot of the web page and compares it with the baseline image. If the new screenshot and the baseline image match, then the test will pass. If there is a difference found in both images, then the test will fail, and a new screenshot showing the difference between both will be created. This makes it very easy for you to trace the exact changes. The tolerance level for difference can be modified in your PhantomCSS file, as well as customized in the Casper test case.
Installation
Pre-Requisites:
1. Install npm on your machine using the NPM installation guide.
2. Install PhantomCSS.
npm install phantomcss casperjs phantomjs-prebuilt --save-dev
Setup:
1. Initialize an npm project.
npm init
2. Install the http-server package.
npm install http-server --save-dev
3. To run the server, let’s define a simple npm script. Just add the following scripts section to package.json
"scripts": {
"start": "http-server"
},
4. Execute the command npm start. Start the server and leave it running for now.
Creating a Test Suite
A PhantomCSS test suite is created in the form of a Node.js script. The website is visited, and a screenshot is taken and compared to the image from the previous run. Below is a simple test case based on the demo from PhantomCSS. Save the script as test.js.
| var phantomcss = require('phantomcss'); // start a casper test casper.test.begin('Tags', function(test) { phantomcss.init({ rebase: casper.cli.get('rebase') }); // open page casper.start('URL'); // set your preferred view port size casper.viewport(1024, 768); casper.then(function() { // take the screenshot of the whole body element and save it under "body.png". The first parameter is actually a CSS selector phantomcss.screenshot('body', 'body'); }); casper.then(function now_check_the_screenshots() { // compare screenshots phantomcss.compareAll(); }); // run tests casper.run(function() { console.log('\nTest Completed.'); casper.test.done(); }); }); |
The test will open the website mentioned in your testcase.js file, take a screenshot of the body element and save it under screenshots/body.png.
Once we have the test itself in place, all that’s left is to define a script to run the test. Let’s add the following script to package.json next to start:
"test": "casperjs test testcase.js"
You can now run it by executing the following command:
npm test
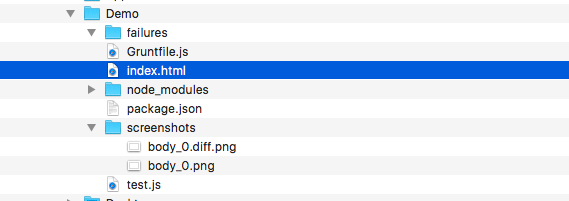
You just successfully ran the first test and created baseline screenshots. Check out the screenshot folder. The baseline screenshot is taken and used to compare with the test output in the future. Next, re-run the test; the tests will pass until any CSS regression is found.


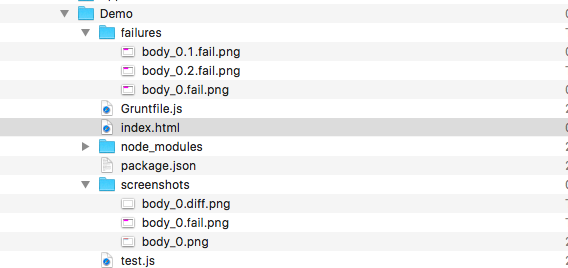
If there is any change in CSS/blocks, or any regression issue found while running tests, the error screenshot is saved in the Failure folder. For instance, if we make changes on the web page and run the test, the test will fail and a failure screenshot will be added so that you can easily trace the difference.
A failed test case will show the mismatch percentage of pixels between the base image and the next run.

Please leave a comment below if you found this blog informative or have any questions.
Part 2 of this post will cover the customizations and functions we will generally need in a test case.


 We respect your privacy. Your information is safe.


