 We respect your privacy. Your information is safe.
Introduction
According to a report by Uptime Institute, application failures can result in a loss of at least $100,000. The chance of these failures is 88% higher in the case of on-premise infrastructure hosting than in the cloud.

This is why digital engineering developers looking to build, ship, and host full-stack, high-quality Next.js applications should choose a reliable cloud platform like AWS Amplify.
Why Choose AWS Amplify
AWS Amplify is a user-friendly, open-source framework empowering developers to create secure and scalable applications. It simplifies the intricacies of setting up backend infrastructure, enabling developers to concentrate on crafting features and providing value to users.
Amplify’s rapid prototyping feature enables faster time to market. It is compatible with well-known frontend frameworks like React, Angular, and Vue.js, ensuring accessibility for a diverse community of developers.
|
AWS Amplify facilitates organizations to move quickly without investing significant efforts in designing and implementing backend AWS services. It helps organizations build mobile and web applications on AWS Cloud with start-up speed and enterprise scale. - Dr. Biswajit Mohapatra, 20+ CIO Awards Winner | AWS and DevOps Institute Global Ambassador |
How To Deploy Next.js App With AWS Amplify
Developers can deploy a Next.js app with Amazon Amplify in four steps without losing important features like Incremental Static Regeneration (ISR) and Server-Side Rendering (SSR).
Step 1: Create A Next.js App
Start by configuring the development environment. Navigate to the deployment settings to customize the app according to requirements.
Get started with building a Next.js application.
Type ‘npx create-next-app next-amplify’ in the Terminal.
Use ‘cd next-amplify’ to navigate to the project directory with the default options chosen.
Use npm run dev to run the Next.js app with its default code.
Next, developers can choose to follow any deployment strategies for the Next.js apps.
Developers using Static Side Generation (SSG) have to modify the package.json file to deploy a Next.js application as shown below."scripts": { "dev": "next dev", "build": "next build && next export", "start": "next start"}
Use ‘next build && next export’ to support SSG pages. This script also exports the app to static HTML, making it work without a Node.js server.
In the case of other deployment methods, no changes are needed in the package.json file.
Step 2: Add Authentication To Your Next.js App
Amplify makes it easy to streamline the frontend and backend for cloud-connected apps. Developers can use the Amplify CLI to add authentication or integrate APIs into the web app.
Run ‘amplify init’ to get started.
Set up authentication resources with ‘amplify add auth.’
After making code changes for authentication, use ‘amplify push -y’ to update the Amplify project.
Install the needed dependencies with the Amplify package to create a functional Authentication UI in the Next.js app.
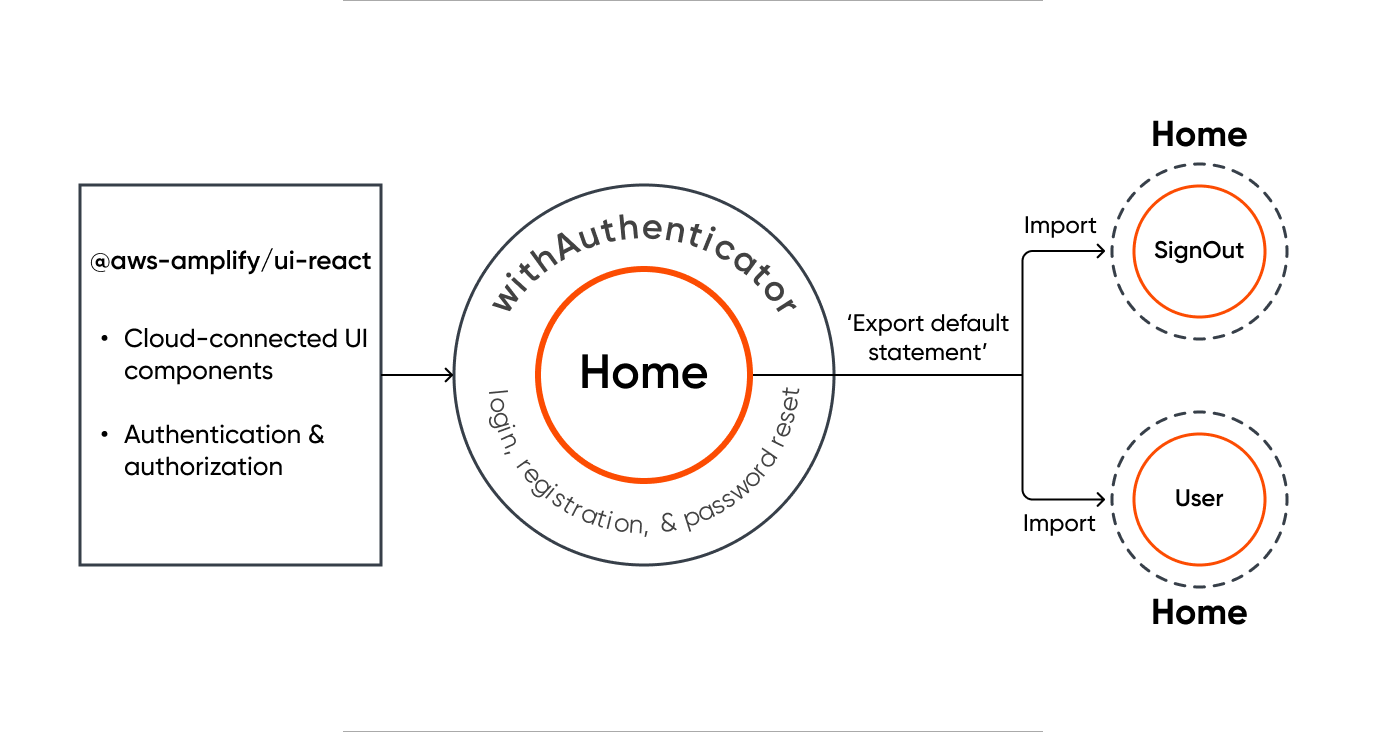
npm install aws-amplify @aws-amplify/ui-react
Now, replace the existing code in the pages/_app.js file with the following:import "@aws-amplify/ui-react/styles.css";import { Amplify } from "aws-amplify";import awsExports from "../src/aws-exports";import '@/styles/globals.css'Amplify.configure({ ...awsExports, ssr: true });export default function App({ Component, pageProps }) { return <Component {...pageProps} />;}
Replace the code inside the index.js file as well.import { withAuthenticator } from "@aws-amplify/ui-react";function Home({ signOut, user }) { return ( <div style=> <h1>Logged in as {user.username}.</h1> <div> <button onClick={signOut}>Sign out</button> </div> </div> );}export default withAuthenticator(Home);
In this example, the “withAuthenticator” function from the ‘@aws-amplify/ui-react’ is used to include authentication functionality to the ‘Home’ component. There are two properties to the ‘Home’ component namely, “signOut” and “user” to display the username and a button to sign out from the app.
The ‘withAuthenticator’ function is a higher-order component that houses the ‘Home’ component and offers authentication features such as login, registration, and password reset. The ‘export default’ statement exports the ‘Home’ component housed within the ‘withAuthenticator’ function. This means that any component importing and using the ‘Home’ function will automatically get the authentication functionality.
Step 3: Push The Code On GitHub
When the web app is fully developed, push it to GitHub. Create a new repository for the project and publish the code as per the given instructions.
git init
git add .
git commit -m "first commit"
git branch -M main
git remote add origin https://github.com/youraccountname/repo.git
git push -u origin main
Step 4: Deploy The Next.js App
Navigate to Amplify from the AWS Console by using the search bar at the top.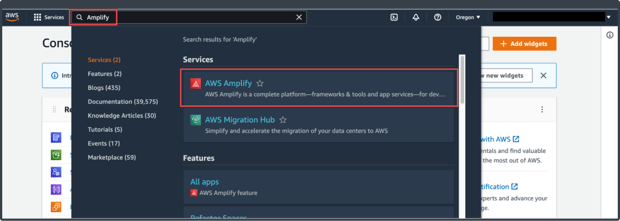
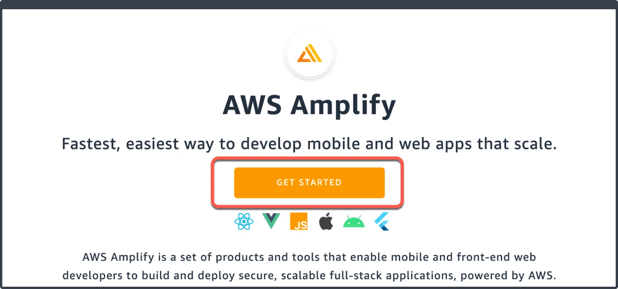
Developers who are new to AWS Amplify will see the signup page. Click ‘Get Started’ to proceed.
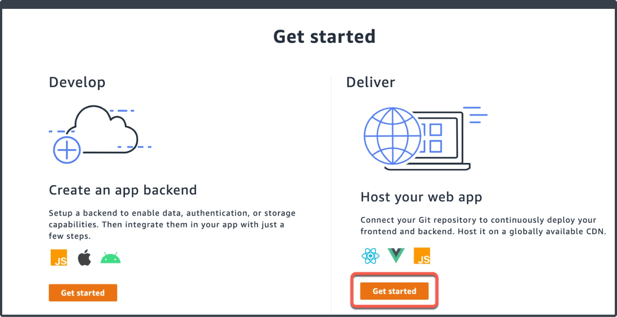
Scroll down to the Amplify Hosting section and click ‘Get Started’ to proceed.
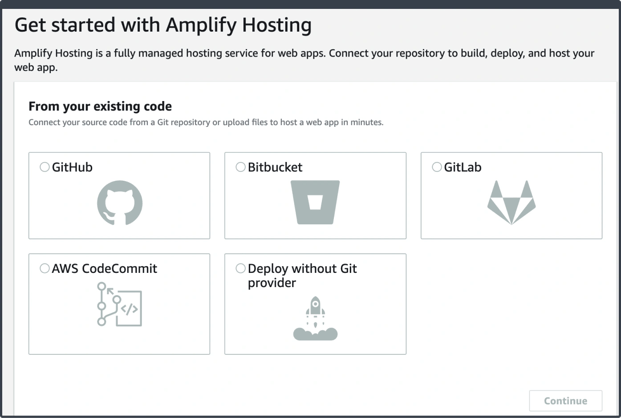
Connect Amplify to the source code from GitHub as the app code has already been pushed to GitHub.
When connecting to GitHub for the first time, developers need to authorize the account to connect with AWS. Once authorized, they will see a new page.
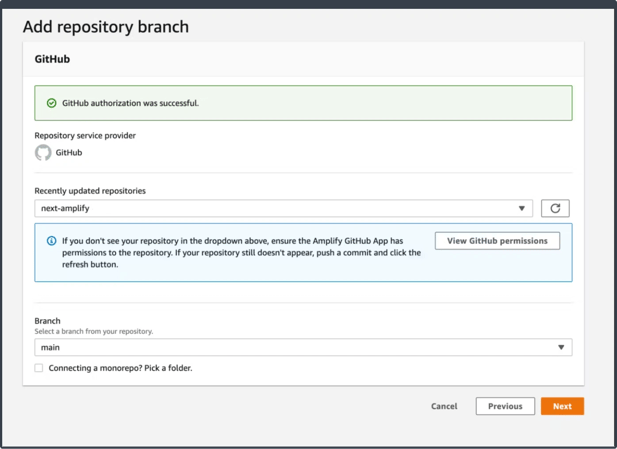
Now, choose a repository. For example, developers can click on a repository named “next-amplify”, read the branch name displayed below it, and click ‘Next’ to proceed.

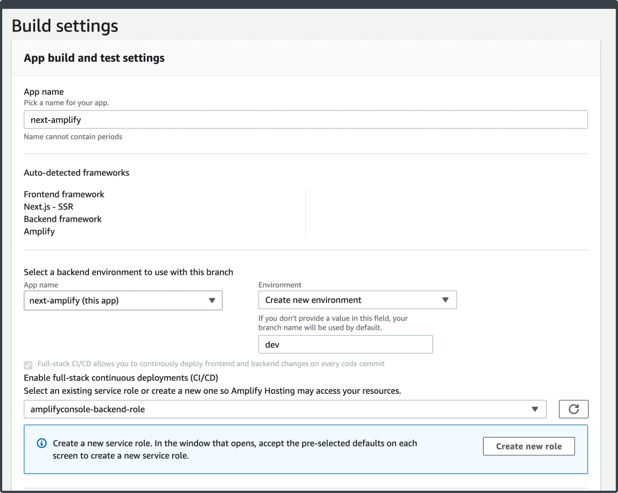
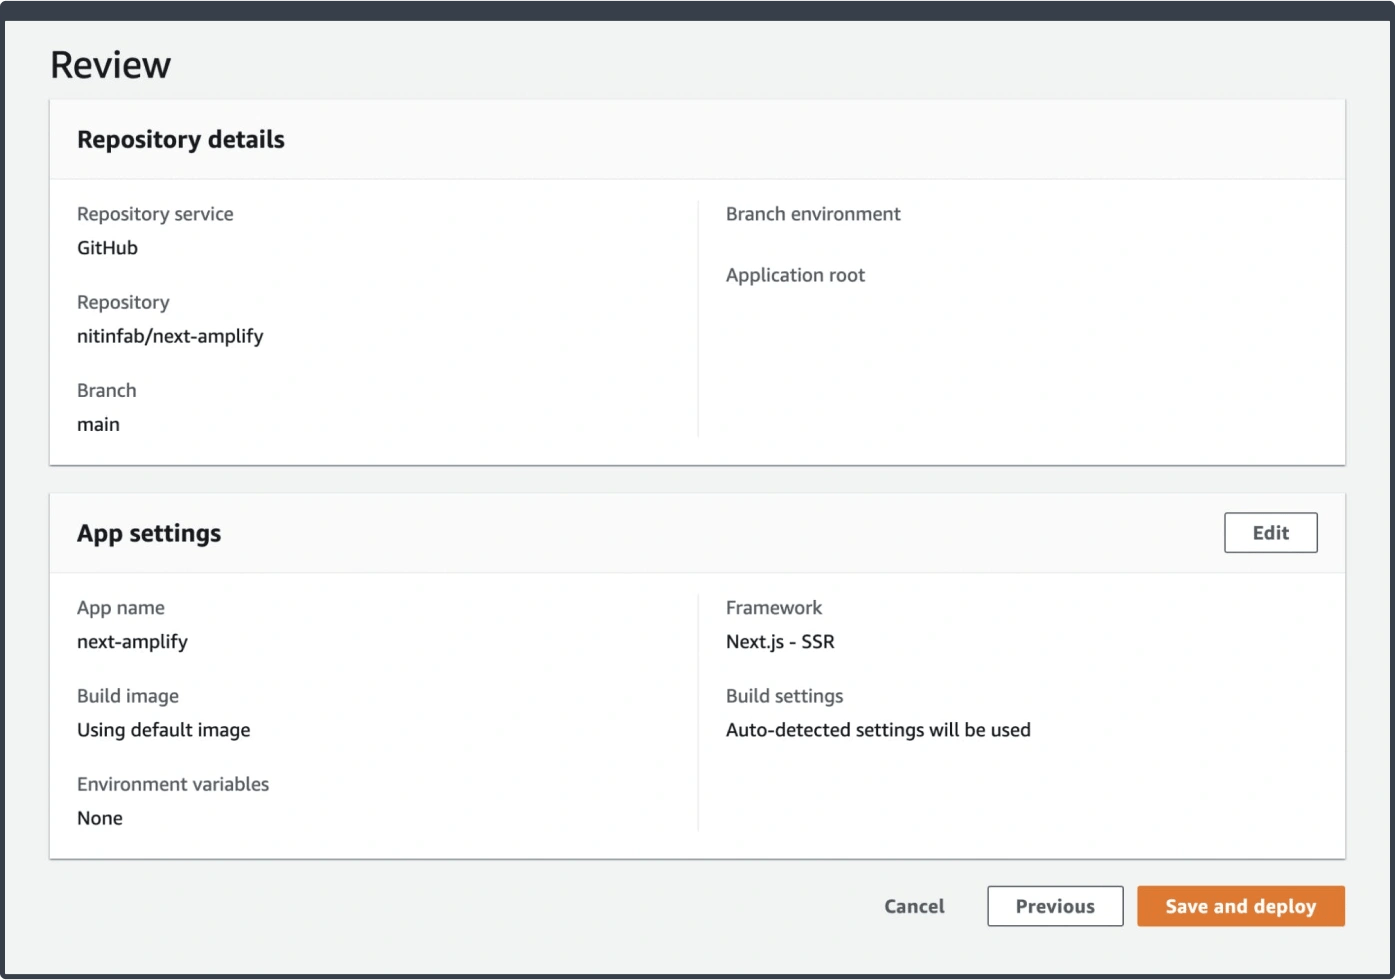
Go to the ‘Build Settings’ page to see the app's name and its recognized frontend and backend frameworks.
Review the app on this page before deployment. If everything looks good, click ‘Save and deploy.’
Wait for the system to finish deploying. Click the link provided to see your Next.js app in action.
How We Built A Highly Performant News Aggregator For Internet Users In Kashmir
In Kashmir, where internet access is often slow due to government restrictions, we developed a special news app. This app is quick to load, can be used offline, and sends users updates.
Axelerant's experts made a simple app that works like a regular one but is light and fast. We used Next.js to create an app that is both speedy and good for search engines.
Our app lets users get update notifications without installing a big app. The website is powered by serverless functions (AWS), making it better for search engines. The whole system runs on AWS and uses serverless tech.
Because our app is small, it's easy to install on phones. It sends push notifications to keep users informed about the latest news, and it works well even without the internet.
Schedule a call with our experts to learn more about how we can help build similar solutions.

Bassam Ismail, Director of Digital Engineering
Away from work, he likes cooking with his wife, reading comic strips, or playing around with programming languages for fun.


Leave us a comment