
 We respect your privacy. Your information is safe.
Introduction
In the first part of this series, we saw how we can get started with Behat! In this part, we will explore the Mink extension and why we should use it along with Behat.
In order to simulate the interaction between the user and the web browser, we need to create a script with a set of actions, like launching the browser, filling in the correct credentials, and hitting the login button. Mink is a PHP library which has defined many ready-to-use step definitions which we can use. For example, in our previous chapter, we ended up writing three functions just to log in. Instead of writing those functions, we can just install Mink along with Behat and get rid of those functions. How? We’ll see soon.
For now, let’s go ahead with the installation of the Mink extension. We will be using our previous setup and just updating the composer with Mink-related dependencies.
Installation
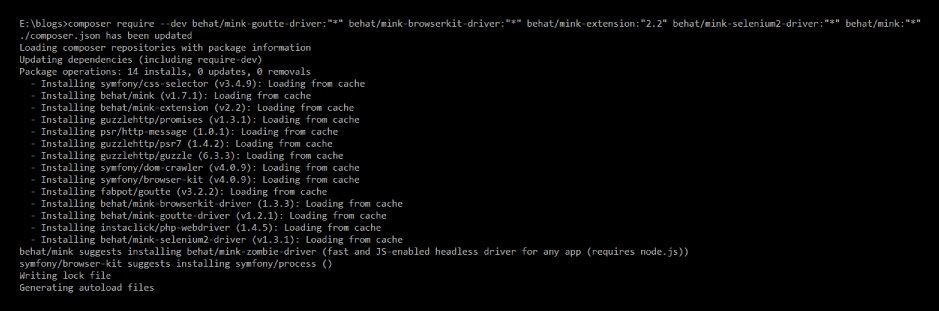
- First, we need to update our Composer file with Mink-related packages. We can do it from the command-line interface using the command:
composer require --dev behat/mink-goutte-driver:"*"
behat/mink-browserkit-driver:"*" behat/mink-extension:"2.2"
behat/mink-selenium2-driver:"*" behat/mink:"*"
- It will take some time to download the dependencies. Once the Composer is updated, you should see the following output:
- Now, we will be creating a very interesting and useful file named “behat.yml”, which is required in order to configure a few things. Create the file in the root of your project directory and paste the following contents:
- In order to connect the feature files with the Mink library, it is important to extend the MinkContext in your FeatureContext.php file. Modify your FeatureContext.php as below:
- Delete all the functions from the FeatureContext.php file that we wrote in the first part of this blog, or you might run into an ambiguous match error if the regex matches twice. Fantastic! We are now all set to start writing our features using the Mink library.
- If you already have created a “gherkin.feature” file, modify it as below, or create it under the “features” directory and paste the following:
Feature: In order to view my Account details,
As an authenticated user,
I should be able to access My account section
Scenario: Verify user is able to view My account section on successful login
Given I am on homepage
And I follow "Sign in"
When I fill in "email" with "fill_in_your_email_ID"
And I fill in "passwd" with "fill_in_your_password"
And I press "Sign in"
Then I should see "My account"
- Run the feature file using the same command vendor/bin/behat. Woohoo! The feature runs and passes successfully! The summary gives an overview of how many scenarios were run, how many passed and failed, the number of steps executed and the time taken. Since, we had only one scenario, the count is 1, and there were 6 steps in this scenario which all got executed.
- Now, try to fail the scenario by entering an incorrect password.
Now that we have executed our first scenario, let’s try and understand how all of this actually worked. Let’s take up the behat.yml first:
- Line 4 defines the directory from where Behat will automatically load all *.php files. These .php files contain all the pre-defined functions that we use in our feature files in the form of Gherkin statements.
- Line 5 defines the suite; there can be one or multiple suites in your .yml file. Currently, we have only one; that is all we need for now.
- Line 10 defines the location for Behat to look for all feature files.
- From Line 11, you’d start activating all the required extensions. In our case, we are just making use of the Mink extension so far.
- Line 13 mentions the browser to be used, which is “Chrome” in our case.
- Line 14 is the default driver to be used in Mink, which is Goutte. Goutte is a headless browser, and the GoutteDriver acts as a bridge between Behat and the browser, handling all the interactions between them. It has a couple of advantages, like it’s easy to set up, and test execution is fast. However, it does not support JS (JavaScript)and AJAX related calls. Hence, we need to set up an advanced driver along with Goutte.
- Line 15 describes which driver to use in case of JS calls. This is the beauty of using Mink—you can get the best of these drivers just by configuring them in your YML file. We are using the Selenium2Driver, and lines 16-19 are a few parameters related to the Selenium2Driver.
- Line 19 is the base URL of your site, which is the homepage of your site.
- You can learn more about Mink drivers here: http://mink.behat.org/en/latest/guides/drivers.html#
When working on a web app, not considering JS and AJAX would be unrealistic. There would be many scenarios where the user needs to wait for JavaScript to be loaded entirely, or wait till the the AJAX request is completely processed, or the script might fail due to element visibility issues. There are various drivers offered by Mink which can help us overcome this problem, but we’re going to be using the Selenium2 driver in this blog. Now, let us slightly modify the feature file by adding a search scenario. The steps are as follows:
- Add the following scenario to your feature file:
Scenario: Verify user is able to search across the site
Given I am on homepage
When I fill in "search_query" with "dress"
And I press "Search"
And wait for the page to load
Then I should see text matching "results have been found."
- Since “And wait for the page to load” is a custom function (not provided by the Mink library), we will have to add a corresponding function in the FeatureContext file. Add the following function to your FeatureContext.php file:
- Run the feature file now. You should see the following output:
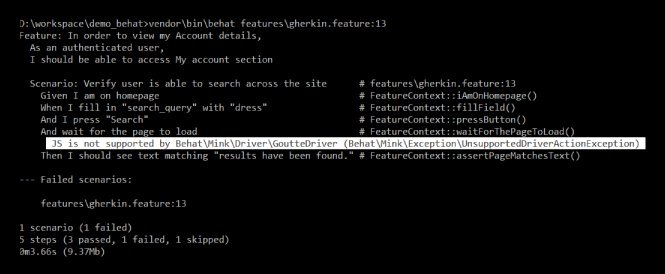
- Notice the highlighted line in the above screenshot. It reflects the usage of Goutte driver for the scenario, and says that “JS is not supported by the Goutte driver”—a pretty readable exception thrown. For such scenarios, let’s use the Selenium2Driver.
- We already have the configuration ready in our behat.yml file, and we have also tagged our feature as @javascript, which tells the Behat runner to use Selenium2Driver instead of the Goutte driver. Go ahead and tag your second scenario @javascript, something like this:
@javascript
Scenario: Verify user is able to search across the site
Given I am on homepage
When I fill in "search_query" with "dress"
And I press "Search"
And wait for the page to load
Then I should see text matching "results have been found."
- Since Behat is all set, let’s download two more things here which we need to run our script in a browser. First, the latest Selenium standalone server, which can be downloaded here, and second, the latest Chromedriver here. Open a new terminal because we need to spin up the Selenium server with the Chromedriver using the following command:
Java -Dwebdriver.chrome.driver=path/to/chromedriver -jar path/to/selenium-standalone-server.jar
- If you were able to successfully run them together, you should see the following output:

NOTE: At the time of writing this blog, the latest versions of Selenium standalone server and Chromedriver are 3.11.0 and 2.38 respectively. You also need JAVA setup on your machine.
- Now, try running the same feature file. Ta-da! The Chrome browser opens up, and you can see that only the second scenario was executed in a browser, while the first scenario was still executed in headless mode.This is the beauty of Mink, which hides the API implementation of different browser types with the help of the various drivers it provides.
NOTE: You can also use headless Chrome to execute JS-related scenarios, which we will see how to set up in the coming chapters of this series. Headless Chrome is preferred over browser-based execution for faster automated test execution.
Now, that you have set up Mink, let us see how to interact with various types of web elements using Behat, Mink and the Gherkin language in the next chapter of this series.

Shweta Sharma, Director of Quality Engineering Services
When Shweta isn't at work, she's either on a family road trip across the country or she's dancing with her kids—it's a great combination.


Leave us a comment