Introduction
Before we begin with the understanding and usage of the Bex screenshot extension in the Behat, make sure you know how to get started with Behat blog series.
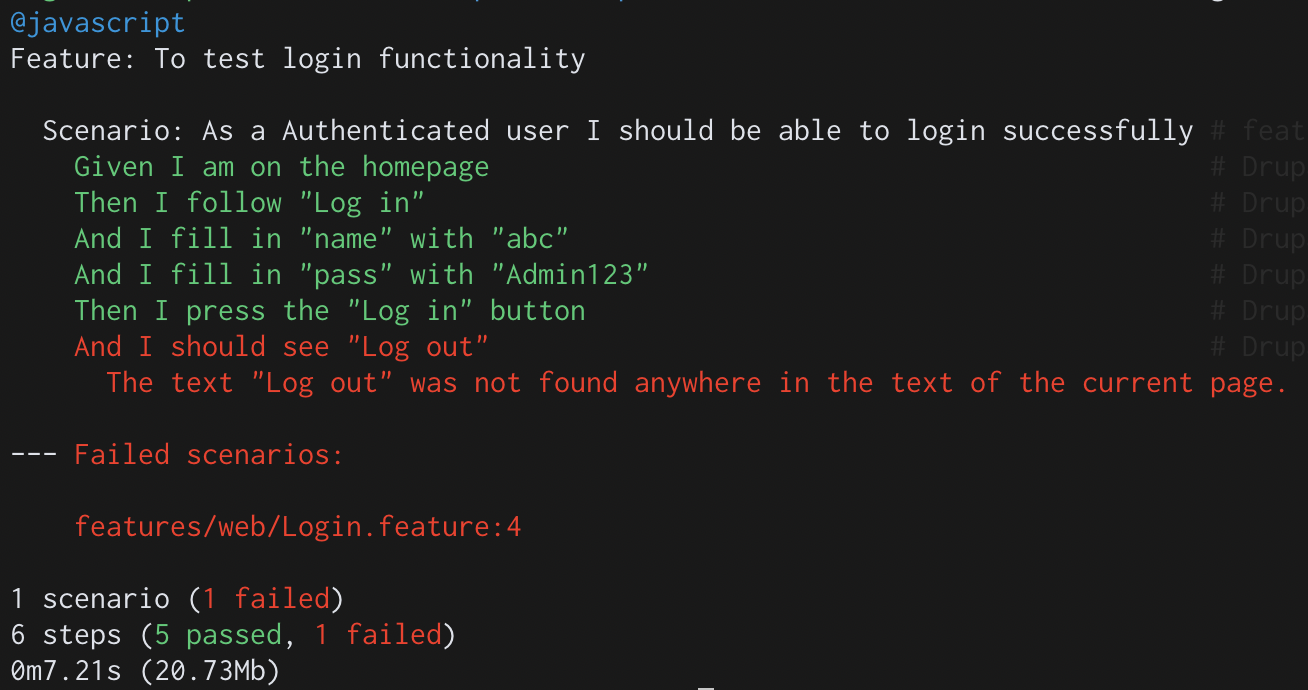
By default, Behat prints output on the console using the pretty format. Please find a sample output below:

As you see in the image above, we know where the scenario failed, however, it might not be exactly known why the scenario failed, especially when you are using headless browsers to execute your automated tests, which is often the case because of various advantages of using headless mode.
When we are executing tests from our local machines, switching back to browser-based execution can help the user understand why the step failed by physically monitoring the execution on the browser. However, In a CI/CD setup, where tests run on headless browsers and you don’t have the privilege of viewing the execution in a physical browser, enabling screenshot extensions for failed scenarios prove to be extremely useful.
Let us see how we can use and enable one of the screenshot extensions in Behat, the Bex screenshot in the following blog to address the problem mentioned.
Installation
Install Bex screenshot extension by the composer.
composer require --dev bex/behat-screenshot
Configuration
You have to enable screenshot extension in behat.yml like:
You can define screenshot mode like:
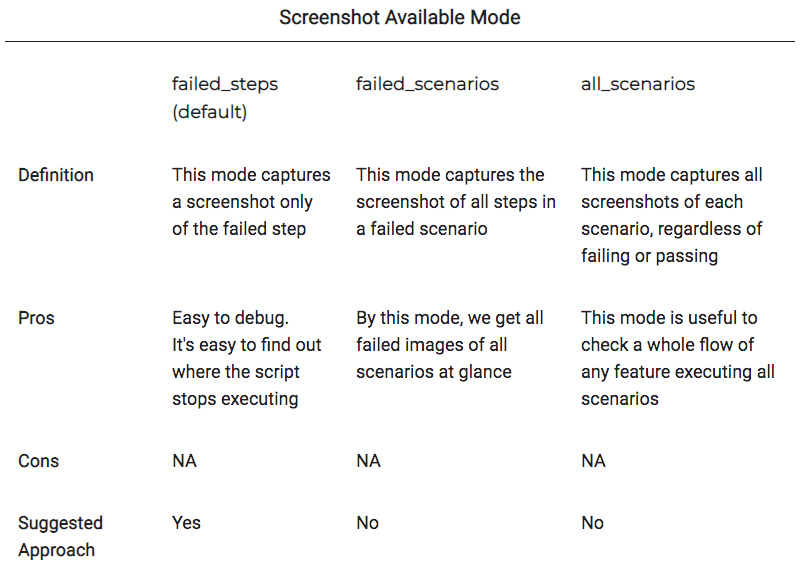
The parameter screenshot_taking_mode enables you to capture screenshots either for all scenarios, only failed scenarios, or only failed steps. Please find the table below which gives a quick comparison of all three screenshot taking modes available with the Bex extension. As we see there are some other available screenshot modes also.

Note:
All the above screenshot modes don't have any disadvantages on one another, you can choose any one mode depending on the requirement or what kind of detail level of output you are expecting from Behat.
Let's see a demo of each screenshot mode:
all_scenarios
We will see a simple login feature with all the correct credentials. Here we will get a screenshot of all steps.
failed_scenarios
We will see a simple login feature with incorrect credentials. Here we will get a screenshot of failed steps along with the next steps.
failed_steps
We will see a simple login feature with incorrect credentials. Here we will get a screenshot of only the failed step.
We can define directory to save those screenshots like:
By default, screenshots are mostly saved in the temporary(/tmp/) system directory. Also, you can specify an image driver which will upload the image to a host.
You can enable more than one image drivers like:
You can disable the extension by removing from behat.yml file or by using enabled parameter like:
This is all about the Bex screenshot extension used in Behat. There are various other extensions available for screenshot in Behat like Integratedexperts and Cevou. More on that later!

Maithili Pednekar, PHP/Drupal Engineer - L2
Gardening daydreamer outside of work, who enjoys cooking tasty recipes for her family.

 We respect your privacy. Your information is safe.


Leave us a comment