
 We respect your privacy. Your information is safe.
Introduction
Behat is a PHP testing framework which can be used to automate acceptance tests in a human readable language called Gherkin. Since it is based on Cucumber, it also helps teams to adopt and implement Behavioral Driven Development (BDD). With BDD, we can ensure that the team is building the right system, and that the system is being built right, since the entire cross functional team (Developers, QA, Manager) and business domain experts participate in creating and reviewing the scenarios (tests) from user stories.
Tests in Behat, which are called scenarios, are written in a feature file, which has a .feature extension.
Before we move on to the details of a feature file, let us understand the installation procedure. Behat supports OSX, Ubuntu and Windows. There are more than a couple of ways to install Behat on your system; I prefer doing it with Composer. Composer is a dependency manager for PHP packages and is used for several PHP tools and frameworks. Read more about Composer here. Below are the steps for installation:
- Set up a MAMP (OSX)/LAMP (Linux)/XAMPP (Windows) server, if you don’t have one.
- Perform a system wide installation of Composer. Click here to read about how to install it on your OS.
- Create a project root directory named “demo_behat”.
- Open a terminal and navigate to the project’s root directory and paste the following command:
composer require --dev "behat/behat:3.0.*"
- Notice that the “composer.json” file gets created with the corresponding Behat dependency listed in it. Also, a few Behat-related libraries will be downloaded inside the ‘vendor’ directory. A composer.lock file, listing some information about all the Behat-related packages downloaded, will also be created. For example, we did not specify the exact Behat version in our JSON file. Composer.lock would tell you the exact version downloaded.
Note: You might need to run this with ‘sudo’ in case you installed Composer using ‘sudo’. Your output might look something like this: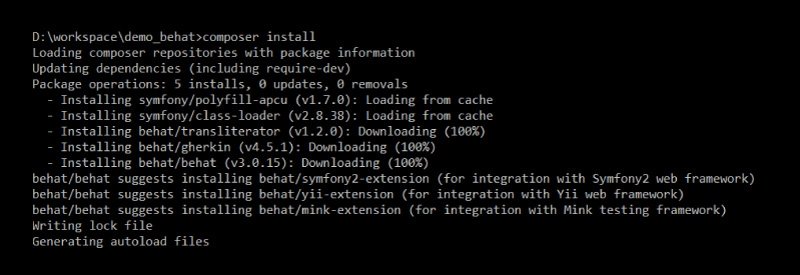
- Now, you need to initialize Behat in order to start using it. Continue with the previous terminal and type the following command:
vendor\bin\behat --init
- This command would create a features and bootstrap directory—this is what we are interested in. The features directory is responsible for holding all your feature files (tests), and the bootstrap directory contains a very interesting file called FeatureContext.php file, which we will see how to use in the coming chapters of this blog series. Successful initialization of Behat should display this output:

- To verify whether Behat is successfully installed, type the following command in the same terminal that was opened at the start of this blog:
vendor\bin\behat -V
If all goes well, you should see the following output: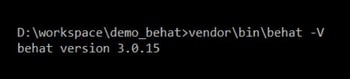
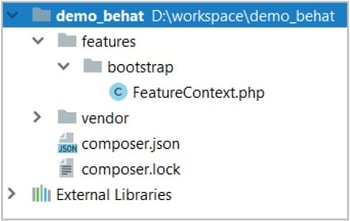
- At the end of the installation, your directory structure should look like this:
- Let’s write a sample feature file to understand how BDD works with Behat. Create a file named “gherkin.feature” under the Features directory. Paste these lines in gherkin.feature and save it:
Feature:
Scenario:
Given I am on homepage
When I login using valid credentials
Then I should see my account section
- Run the feature file using the command ‘vendor/bin/behat’. The output should look like the screenshot below.
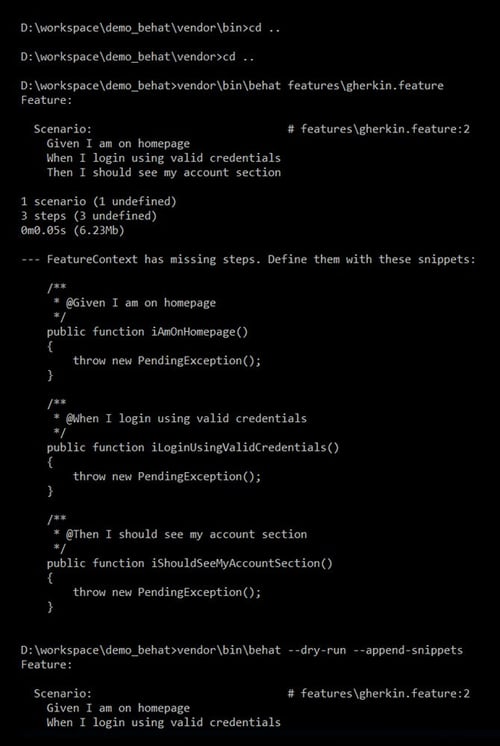
This is because the statements written in our feature file are looking for corresponding functions. By default, Behat writes the body of these functions for us when it is not found in the FeatureContext.php file. All these functions throw an exception by default to ensure that the step doesn’t pass if the correct glue code is not written for the function. So, the next step is to ensure that these functions are appended to your FeatureContext.php file.
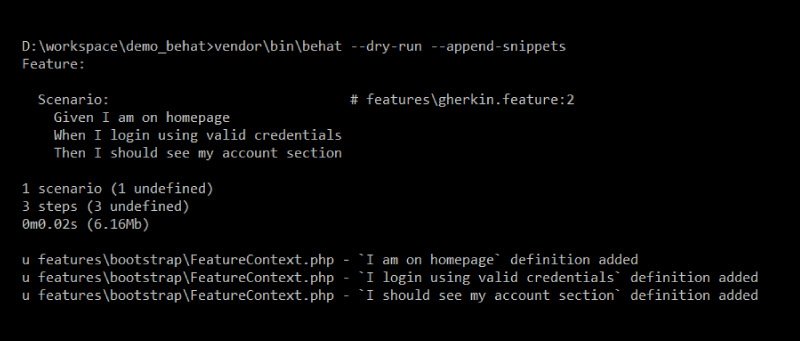
- In order to that, try running the feature file once more using the command:
vendor/bin/behat --dry-run --append-snippets
- You should see the following output:
- Run the feature file once more using the command:
vendor/bin/behat
It now asks us to write the pending definition.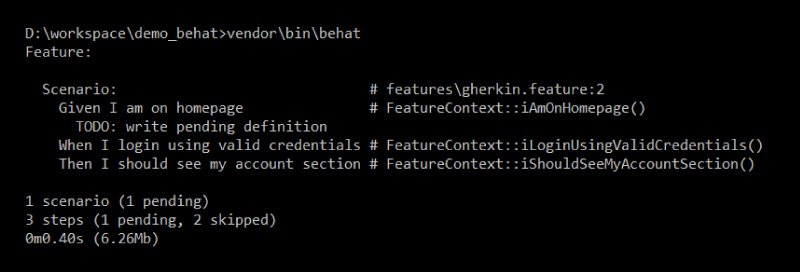
In the next chapter, we’ll look at how to make use of the Mink library along with Gherkin to execute the steps above without writing any PHP code.

Shweta Sharma, Director of Quality Engineering Services
When Shweta isn't at work, she's either on a family road trip across the country or she's dancing with her kids—it's a great combination.


Leave us a comment