
 We respect your privacy. Your information is safe.
Introduction
Acquia Site Studio (formerly Cohesion) is a low-code platform with an easy-to-use drag-and-drop visual user interface that's used to create components, page layouts, styles and other aspects of a website's theme. Plugged into Drupal, it offers an extensive set of features paving the way for low-code website development.
What Makes Site Studio So Popular?
In September 2019, Acquia completed the acquisition of Cohesion, which included Cohesion's flagship product, DX8, an enterprise-grade low-code, no-code solution for Drupal. Cohesion, now Acquia Site Studio, gained significant recognition. It also struck a good balance between being - developer and content-editor-friendly.
Speaking of developer-friendly features, there was one specific area that had scope for improvement. It was - how Site Studio managed its configurations.
In the previous iterations, a popular, if not the only approach, was to export all Site Studio configurations which included components, styles, templates, and website settings in a single directory. But that led to certain shortcomings, which became glaringly apparent on larger projects. As a result, Site studio development in a large team often became an exercise to not step on each other's toes.
The latest versions of Site Studio support a newer way of managing configurations, this method is called Advance Package Management in the official documentation.
How To Use Acquia Site Studio Advance Package Management?
Any user can effectively use Acquia Site Studio’s Advanced Package Management by following this step-by-step guide:
1. To begin with, users will need a Drupal installation with Site Studio setup including working Site Studio keys, namely Site Studio API key and Agency Key. Users can also request the Sandbox keys to follow along with this walkthrough.
Note: Users who’re setting up the Acquia Site Studio from scratch on the website (sans any Site Studio configurations to export), can use the Site Studio UI Kit as a set of configurations. Site Studio UI Kit is a plug-and-play collection of components and styles. Users can import the downloaded package from Site Studio > Sync Packages > Import packages.
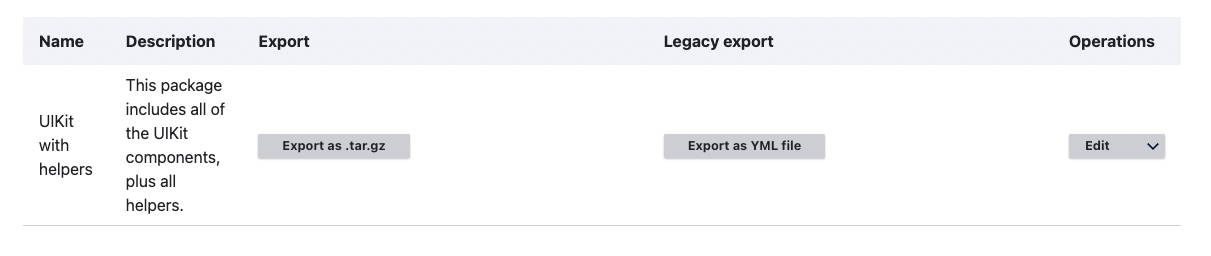
2. Visiting Site Studio > Components provides a view of all the components that exist and can be bundled as packages. Visiting Site Studio > Sync Packages > Manage packages provides a view of all the packages currently in the system. If users have imported the Site Studio UI Kit, they’ll be able to see that package listed as shown in the image below.
3. Post this, users will require a site studio sync directory set up. To proceed, a directory structure needs to be created in the docroot such as -
| /config/sitestudio_sync |
Once this is done, the package needs to be exported to the directory.
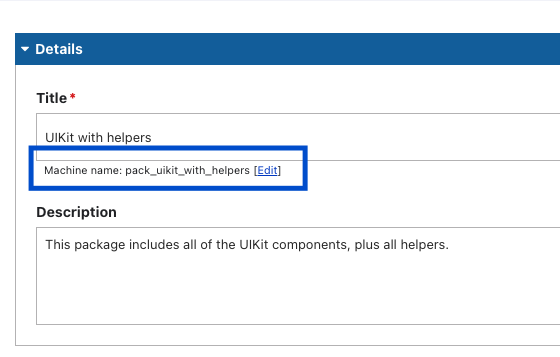
4. The next step is to Find the package name we want to export. Technically, users need to find the machine_name of a package. In this case, it is:
| `pack_uikit_with_helpers` |
Users can then run the following Drush command -
| `drush sitestudio:package:export --package=pack_uikit_with_helpers --path=/app/web/config/sitestudio_sync/pack_uikit_with_helpers` |
5. Once the users have chosen the directory created, the path where the package will be exported needs to be specified. Users will also need to specify the exact package name to export. This will lead to the configurations which are part of the package being shipped by Site Studio.
Here’s the output:
| `$ drush sitestudio:package:export --package=pack_uikit_with_helpers --path=/app/web/config/sync/sitestudio/pack_uikit_with_helpers |
Upon visiting the directory, users will be able to view that Site Studio has exported all the configurations: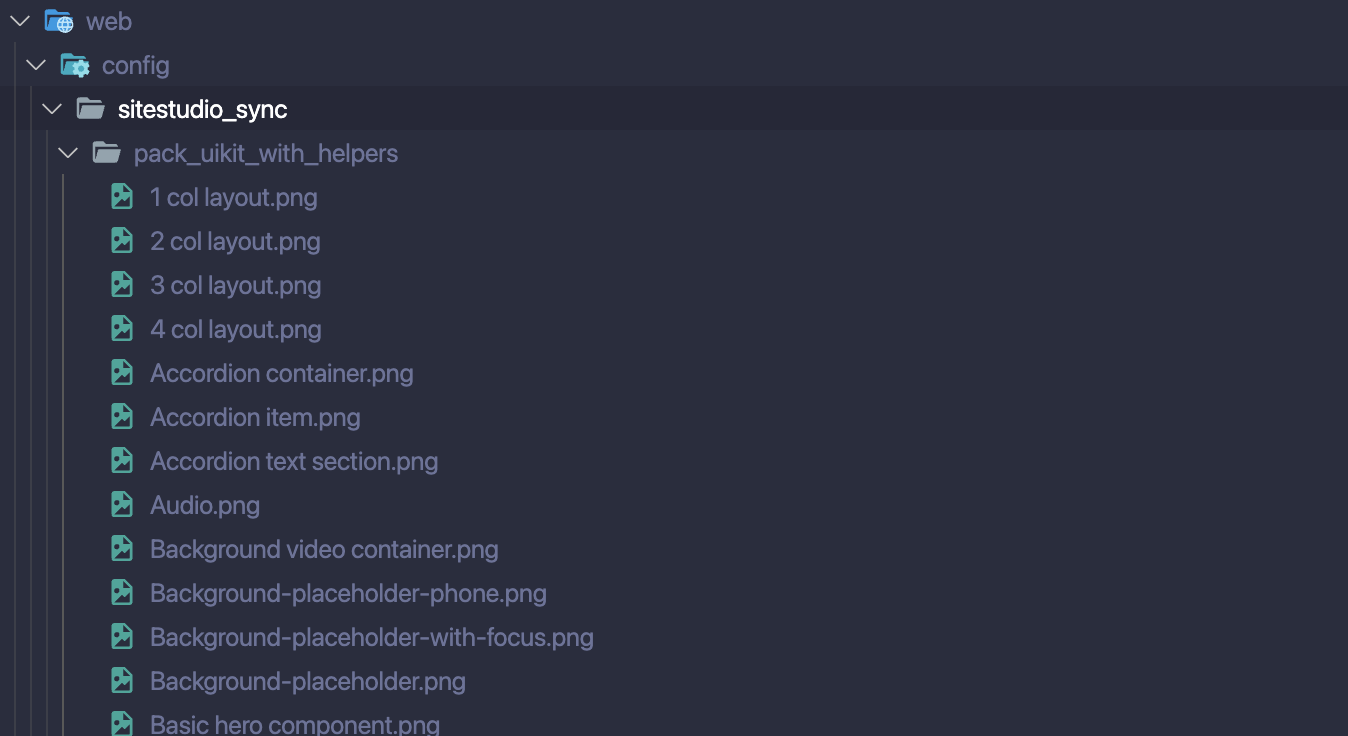
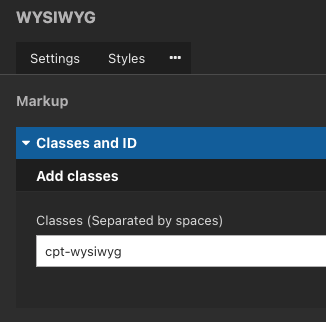
6. When the export is completed, the next step is to test the configuration export. Users need to find a component and make some changes. For this, it is recommended that users take an action, which is easily trackable. The following instance uses the Text (cpt_text) Component that comes with the UI Kit. A class to the WYSIWYG element is added to it.
After saving changes in UI in the terminal, users need to export the package again to view whether or not the changes are correctly exported.
| $ drush sitestudio:package:export --package=pack_uikit_with_helpers --path=/app/web/config/sitestudio_sync/pack_uikit_with_helpers |
| Files in your export directory (/app/web/config/sitestudio_sync/pack_uikit_with_helpers/) will be deleted and replaced with the package config and files. (yes/no) [yes]: |
Caveat: Before verifying the changes, users need to note that before executing the command, the replacement of the previous export needs to be confirmed. Whenever users export a package, it will replace all the configuration files in the directory.
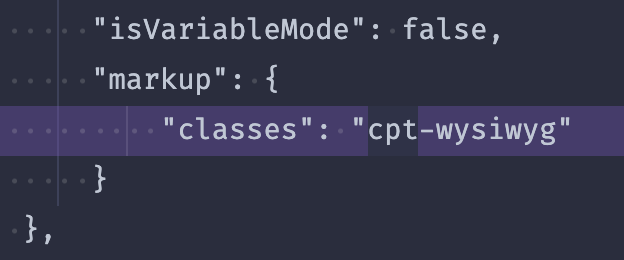
7. The next step is to check the configuration file for the changes exported. The configuration file once located, will display the following class:
| cohesion_elements.cohesion_component.cpt_text.yml |
8. With the export working fine, users need to set up the import. In the config sync directory, /config/sitestudio_sync users need to create a file site_studio.packages.yml
9. During the import process, this file notifies Site Studio about all packages it needs to import. The contents of this file are straightforward, and users are required to list down every package created.
Here’s an example of a new package added for demonstration:
| - type: package source: path: config/sitestudio_sync/pack_uikit_with_helpers options: extra-validation: false - type: package source: path: config/sitestudio_sync/pack_colors options: extra-validation: false |
10. To test the import, users can revert the change done by going to the Text (cpt_text) Component and removing the previously added class for the WYSIWYG.
11. The next step is to run the command using the following code -
| drush sitestudio:package:multi-import --path=/app/web/config/sitestudio_sync/site_studio.packages.yml |
Once the command runs successfully, users will be able to view the following output:
| > [notice] Synchronizing configuration: update cohesion_elements.cohesion_component.cpt_text. > [notice] Finalizing configuration synchronization. > [notice] Building cohesion_component - Text - cpt_text > [notice] Securing twig template directory. > [notice] Flushing render cache. > [notice] Message: Package configuration was imported successfully. > > [notice] Message: Package files were processed successfully. In total 0 new files imported and > 0 existing files updated. > > [notice] Message: Entities in use have been rebuilt. |
Note: Only a single component was updated. This is because only that particular component had a different configuration in the code.
12. Finally, users will have a working export/import for Site Studio using the Advanced Package Management method.
What Are The Best Practices For Advance Package Management in Site Studio?
Here are some best practices, which can be implemented for advanced package management in Site Studio:
Ensure 1:1 Mapping Of Configurations & Packages
Users should ensure they don't export the same configurations in multiple packages while building packages in Site Studio. This is because it doesn't take into account that a particular configuration is already exported as part of a different package. It’s important to `uncheck` any dependencies already present in other packages during the building packages step
Build Packages By Configuration Type
An excellent way to build packages is by configuration type rather than a feature. One package can be each for colors, fonts, templates, and component types (layout, basic, etc.). This makes the development process more predictable for the team.
Deletes Are Not Automatic
Delete doesn't work via configuration files automatically. For example: If users want to delete a custom style, then the correct flow will be to delete the style from the UI. The next step would be to build and export the package, which will remove the configuration for the style from the package sync file.
More details can be gathered from the Anatomy of a package. Just removing the file via code won't update the package in the UI. As a last step after ensuring the config file is deleted from the package, users must manually delete the style on each environment. Hopefully, in the future, there’ll be a drush command or some other alternative to automatically delete a configuration without manual intervention.
Ensuring All Packages Are In Sync
Every time a configuration is changed, users must export all the packages that might be impacted. Since there is no single command to export, it’s crucial to identify each package including the change and then proceed to export the configuration.
Conclusion
To sum up, the advanced package management method in Acquia Site Studio offers a cleaner, faster, and more optimized approach to managing configurations. By separating configurations into packages, developers can easily organize and maintain their Site Studio projects.
The new method provides modularity, allowing for the selective import of configurations and better integration with modern tools and development processes. By adopting this method, developers can take full advantage of Site Studio's capabilities and streamline their configuration management processes.
Leverage the power of advanced package management in Acquia Site Studio and embrace modular and targeted configurations for more effective development. Let Axelerant experts assist you.

Swarad Mokal, Technical Program Manager
Big time Manchester United fan, avid gamer, web series binge watcher, and handy auto mechanic.


Leave us a comment