 We respect your privacy. Your information is safe.
Introduction
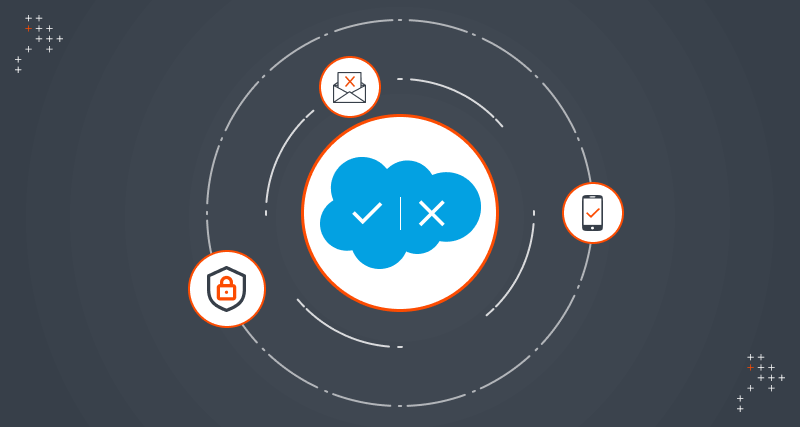
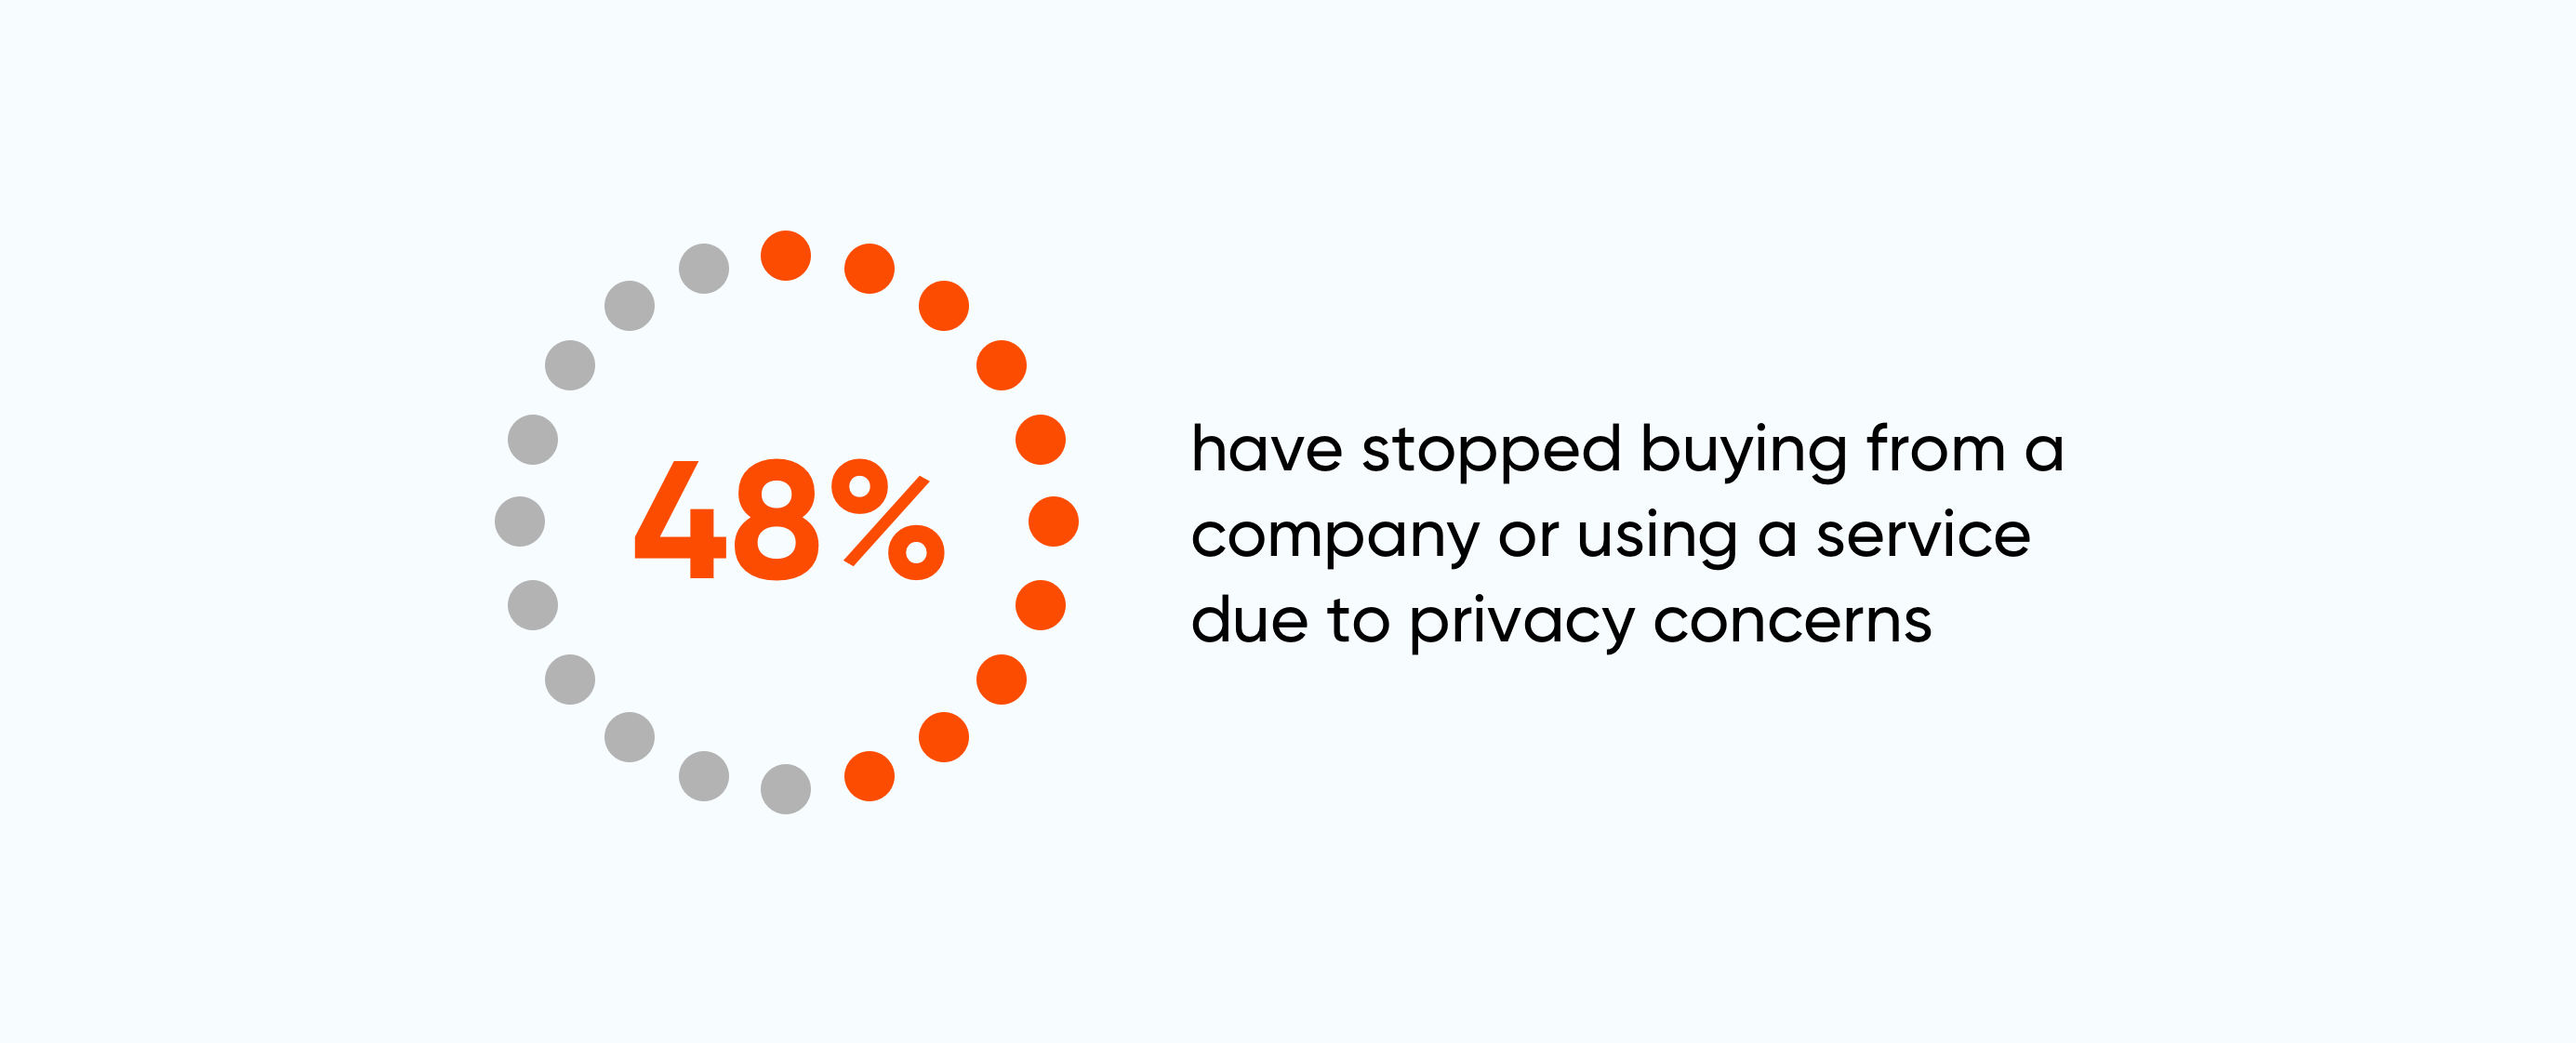
Data can lose its value and relevance without effective privacy and consent management. A recent report by Tableau revealed that 48% of consumers had discontinued their purchases or stopped using a service due to privacy concerns.
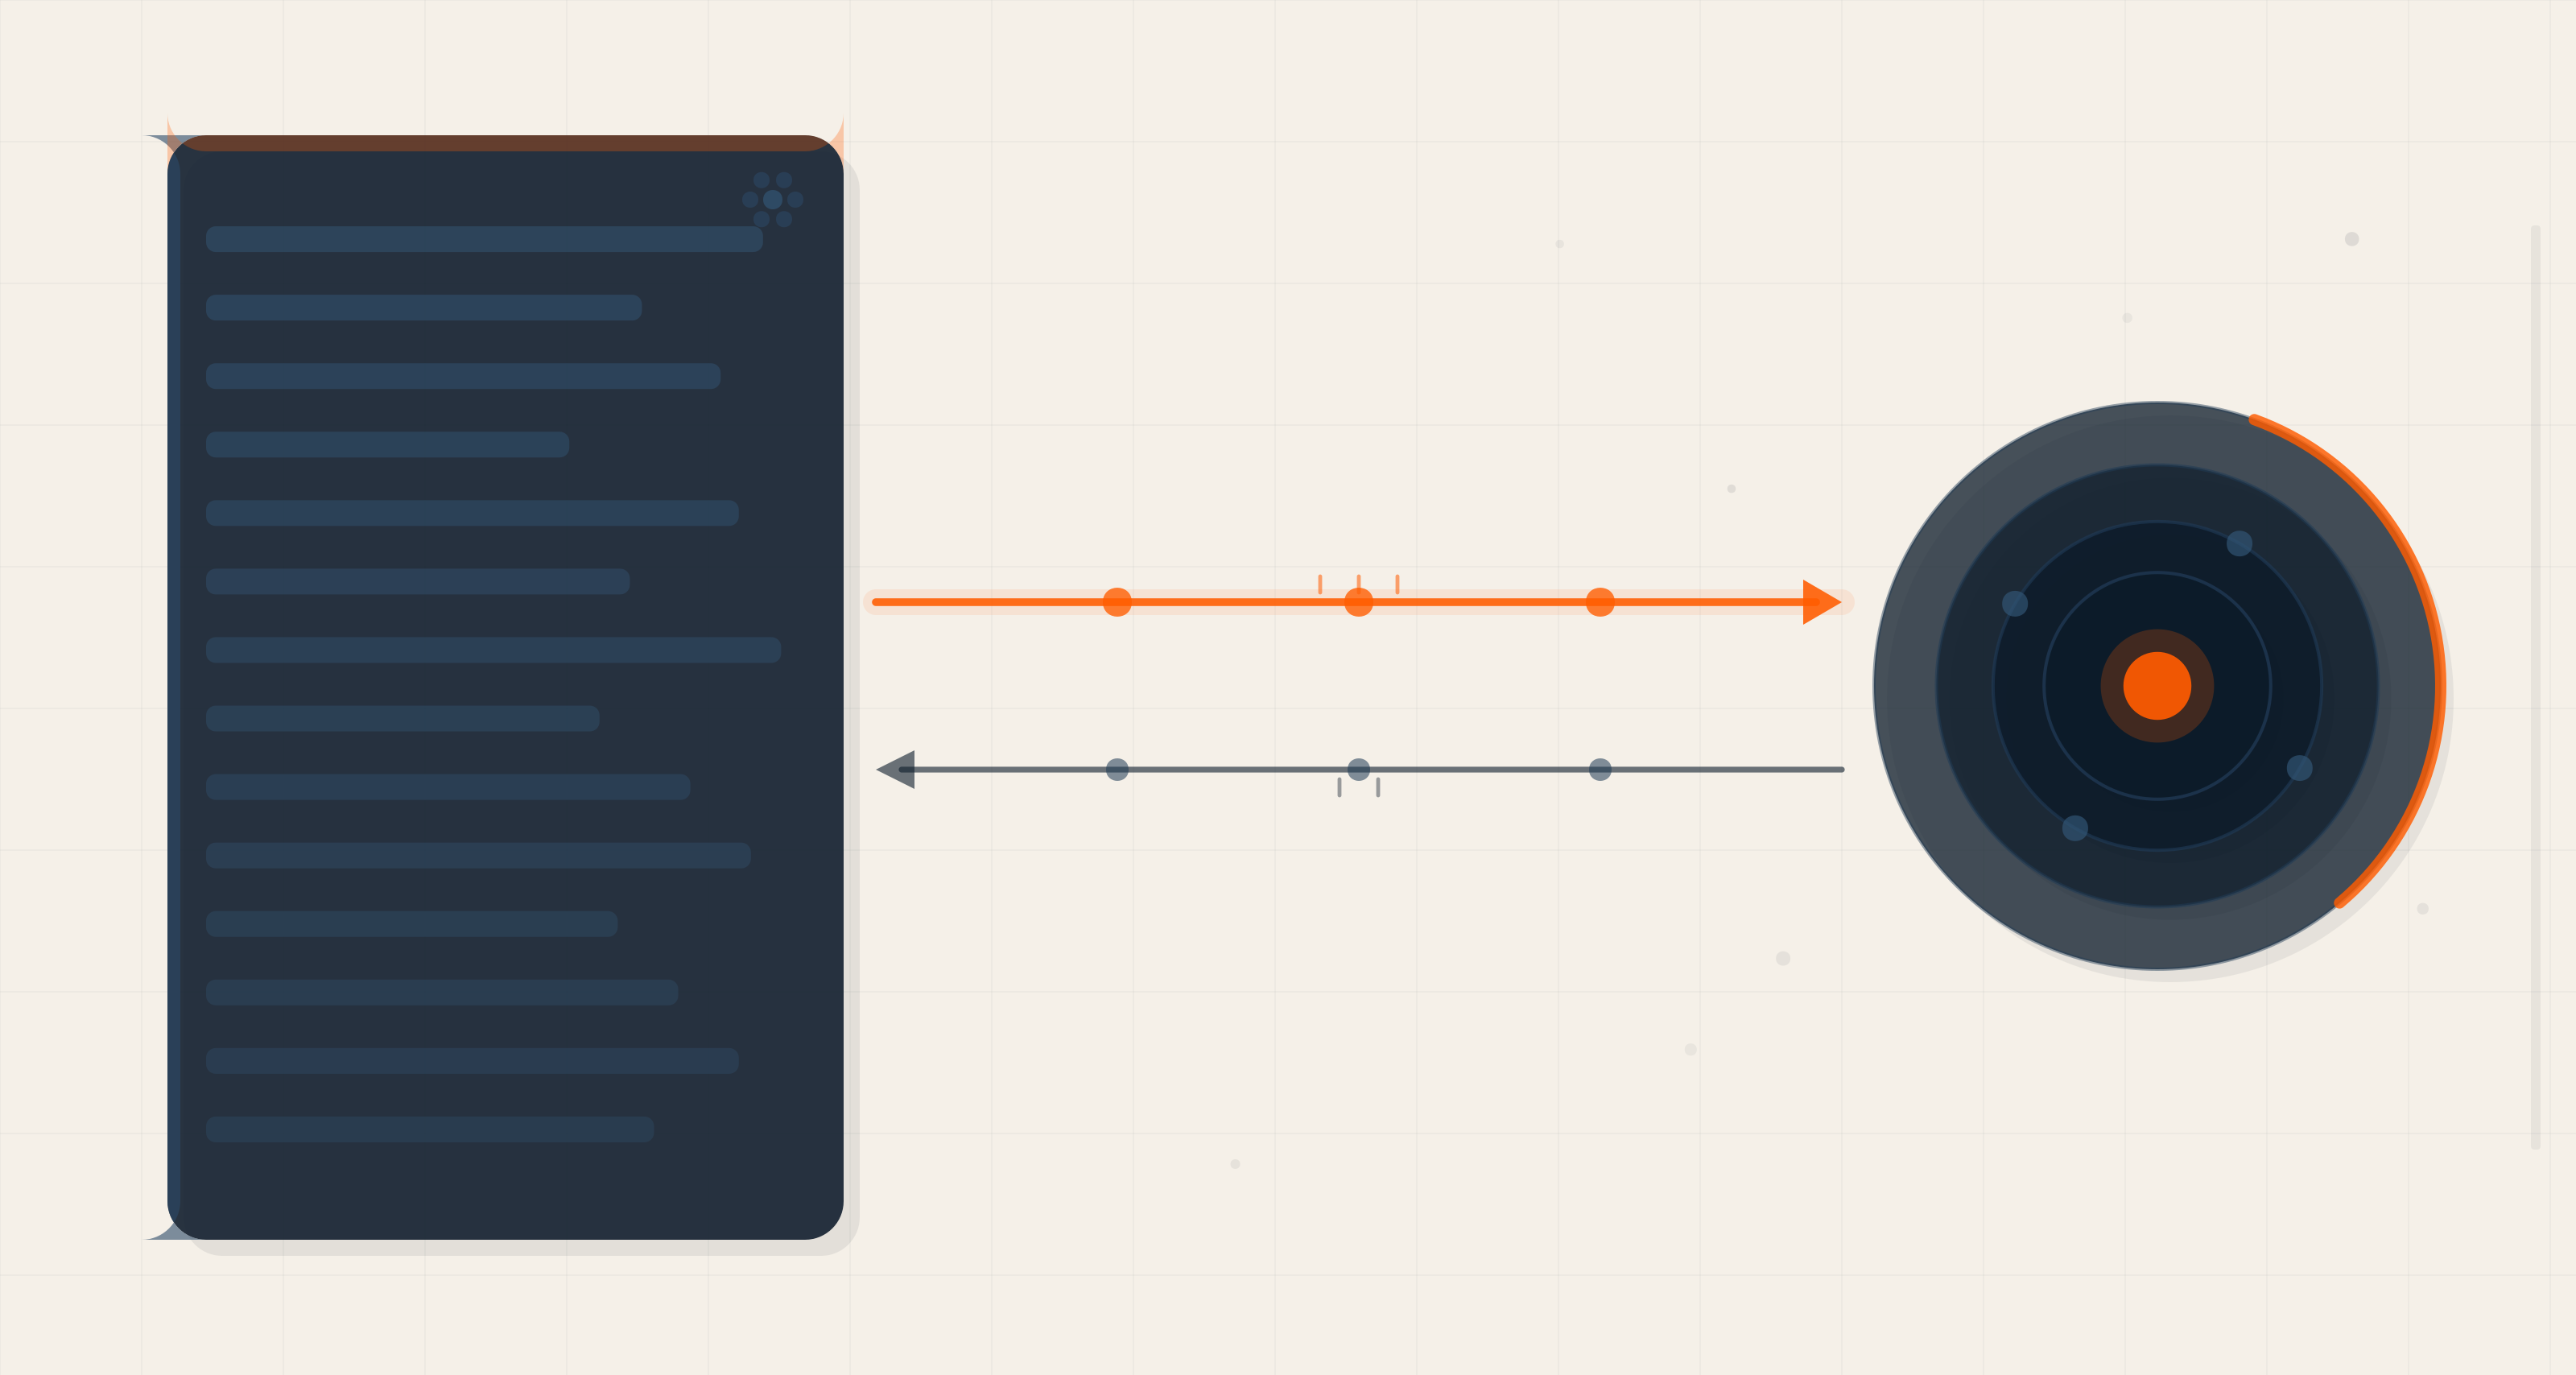
Organizations must prioritize consent and privacy management throughout their data ecosystem in today's data-driven world. By leveraging the capabilities of Salesforce Marketing Cloud Engagement, businesses gain access to a comprehensive suite of tools and data models that enable robust consent and privacy management.
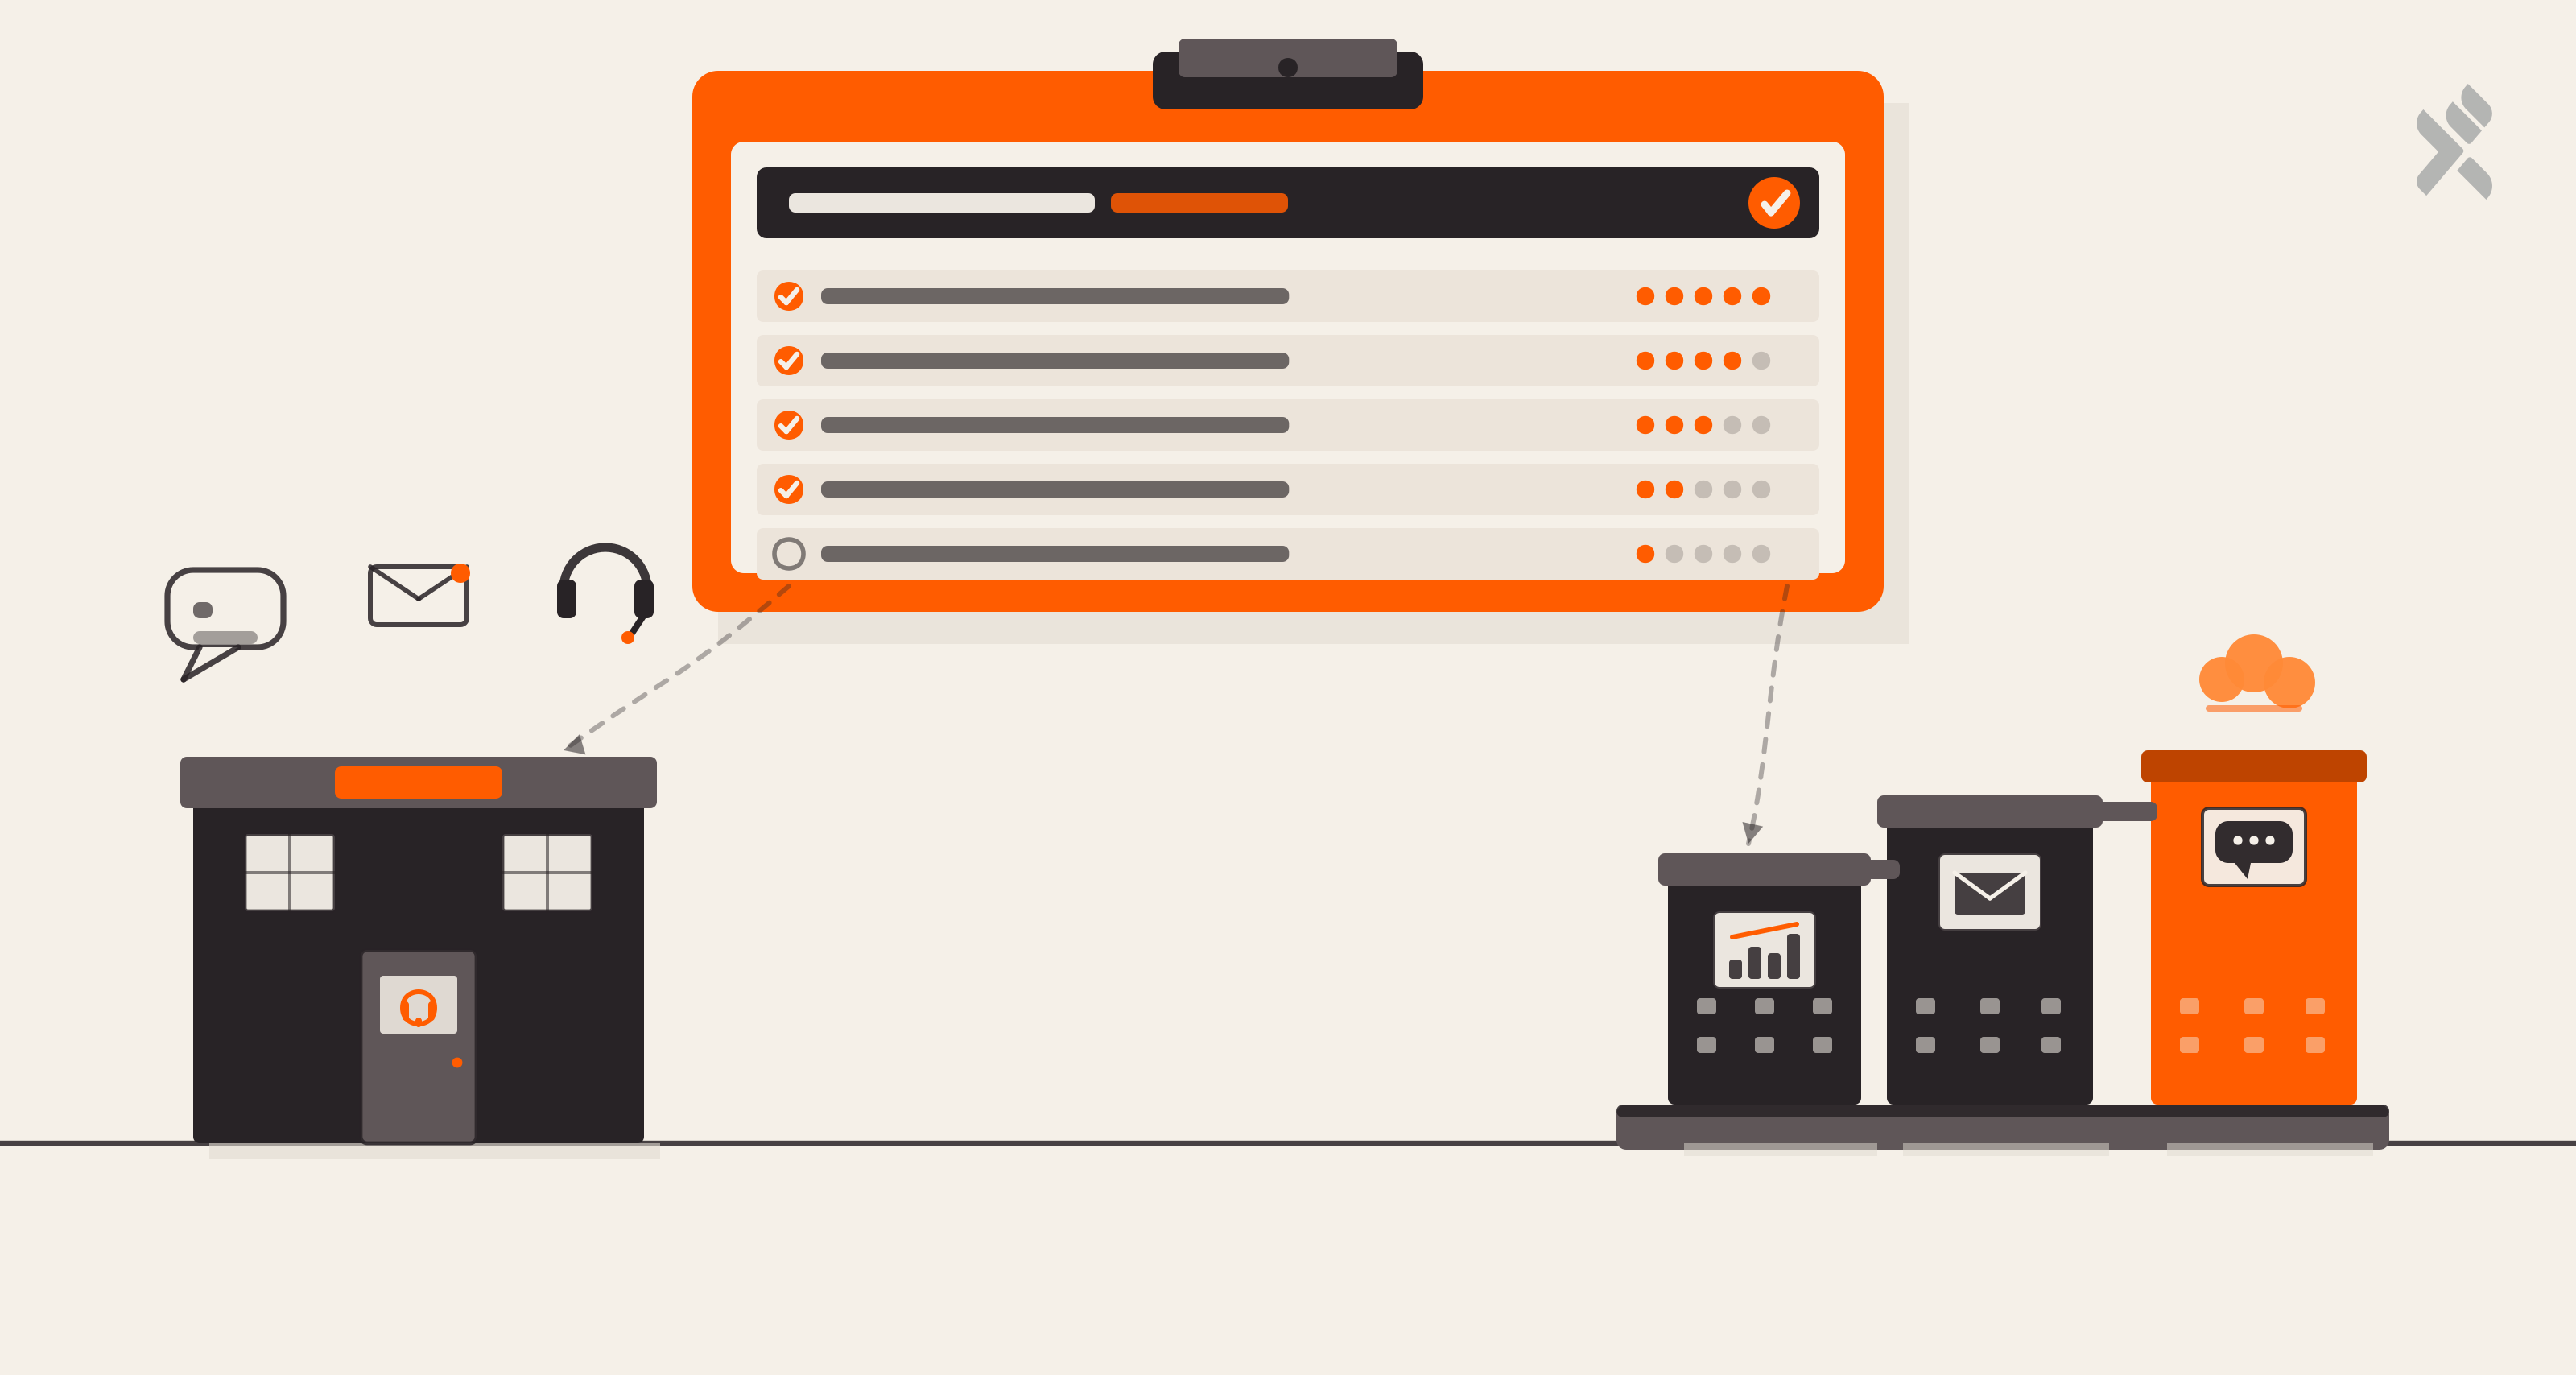
Using Different Types Of Marketing Cloud Data Protection And Privacy Tools For Consent Management
Marketing Cloud provides access to several tools that can help create a data protection and compliance plan.
Consent Management Tools
Many data protection and privacy regulations require organizations to honor user requests about their data use. Customers can request that organizations restrict using their data for tracking and analytical processing.
These functions usually occur when deciding what content to deliver to what customer or using that data to predict future behavior. For example, customers might request that organizations not track their messaging and online behavior.
In this case, organizations can create a mechanism for receiving a Do Not Track request, which can suppress subscriber-level events like replies or clicks.
Consent management tools help organizations obtain consent for all marketing activities and prevent tracking of contacts who request otherwise. Businesses need to take different actions to enable consent management in Salesforce applications.
|
Application |
Action |
|
Email Studio |
Configure the Do Not Track attribute for your account. Set the attribute in Email Studio to either store or prevent storage of behavioral data based on subscriber preference. |
|
MobilePush |
Implement the latest version of the SDK for iOS and Android. Add the Do Not Track functionality to the app and prompt users to download the latest version. Marketing Cloud captures the privacy and consent preferences stored on the app. |
|
Personalization Builder |
Prevent tracking and profiling in the app to stop Marketing Cloud from recording and storing behavioral data based on contact activities. |
|
Social Studio |
Social Studio does not utilize any cookies or other tracking technology for customers. The customer is responsible for managing necessary consents for cookies or tracking technology. |
Consent can also be captured by using the Salesforce Consent Data Model. This data can be connected to Marketing Cloud to respect users' consent preferences.
Data Deletion
Data deletion tools help remove contact and other personal information from Marketing Cloud whenever requested.
|
Application |
Action |
|
Contact Builder |
Use Contact Delete in Contact Builder to remove contact information from Marketing Cloud. |
|
Personalization Builder |
Use the Personalization Builder Privacy REST API to delete a contact’s customer profile. |
|
Social Studio |
Regarding Twitter, Facebook, and YouTube, individuals are responsible for deleting public data through their respective social media platforms. Social Studio receives updates from these social networks. |
Data Portability
Data Portability tools help provide a copy of contact information to the contact who requests that action.
|
Application |
Action |
|
Automation Studio |
Use data extracts to obtain the record based on the contact's ID value. |
|
Personalization Builder |
Contact your Marketing Cloud account representative for help. |
|
Social Studio |
Subject to specific limitations, it is possible to export managed account data from Social Studio either in the Analyze tab or by using cross-workplace reports. Individuals can also export their social media data directly from the relevant social network. |
Restrict Data Processing
These tools help prevent the processing of contact data due to legal reasons.
|
Application |
Action |
|
Marketing Cloud REST API |
Use the Contact Restriction REST API to restrict the processing of a contact record. This process prevents further Marketing Cloud activity or modifications of the contact. |
|
Personalization Builder |
Use the Personalization Builder Privacy REST API to restrict the processing of a contact’s profile. |
Configuring Consent Preferences With The Consent Data Model
Organizations can implement simple and complex consent management practices based on their requirements with the Salesforce Consent Data Model.
What Is The Salesforce Consent Data Model
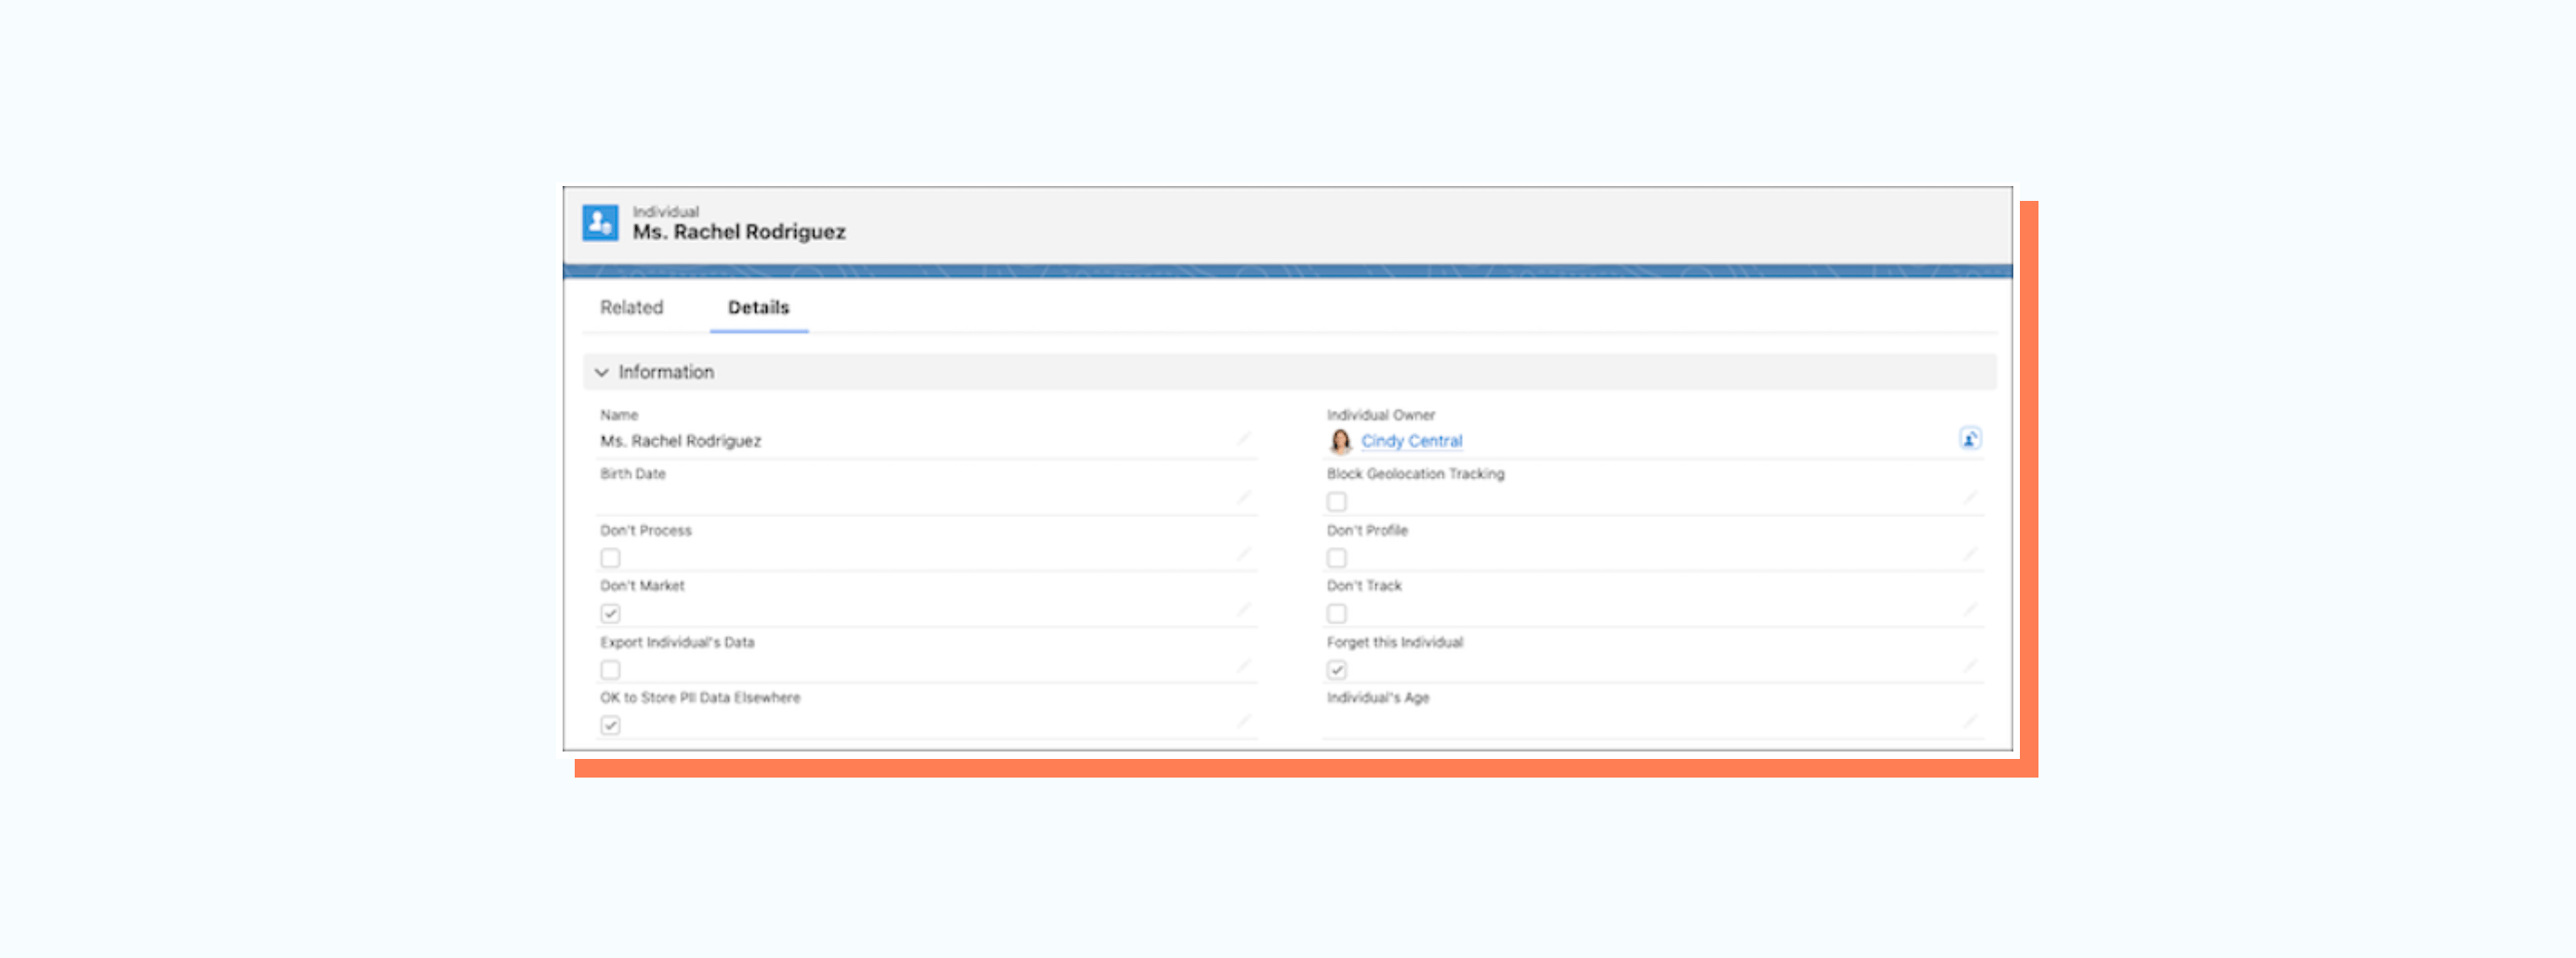
The Salesforce Consent Data Model is a standardized model for managing consent at various levels, ranging from broad preferences to detailed controls. It encompasses the user’s entire interaction experience.
Within this model, any records associated with an individual, such as leads, users, person accounts, and contacts, can have linked consent preferences. This model allows organizations to select the suitable level of consent management and introduce additional granularity according to their specific requirements.

The Four Levels Of Consent Management
In the Salesforce Consent Data Model, consent is managed on four levels, including:
Global Consent
Global consent manages comprehensive consent settings on the individual object, recording whether a customer has approved certain communications.
Engagement Channel Consent
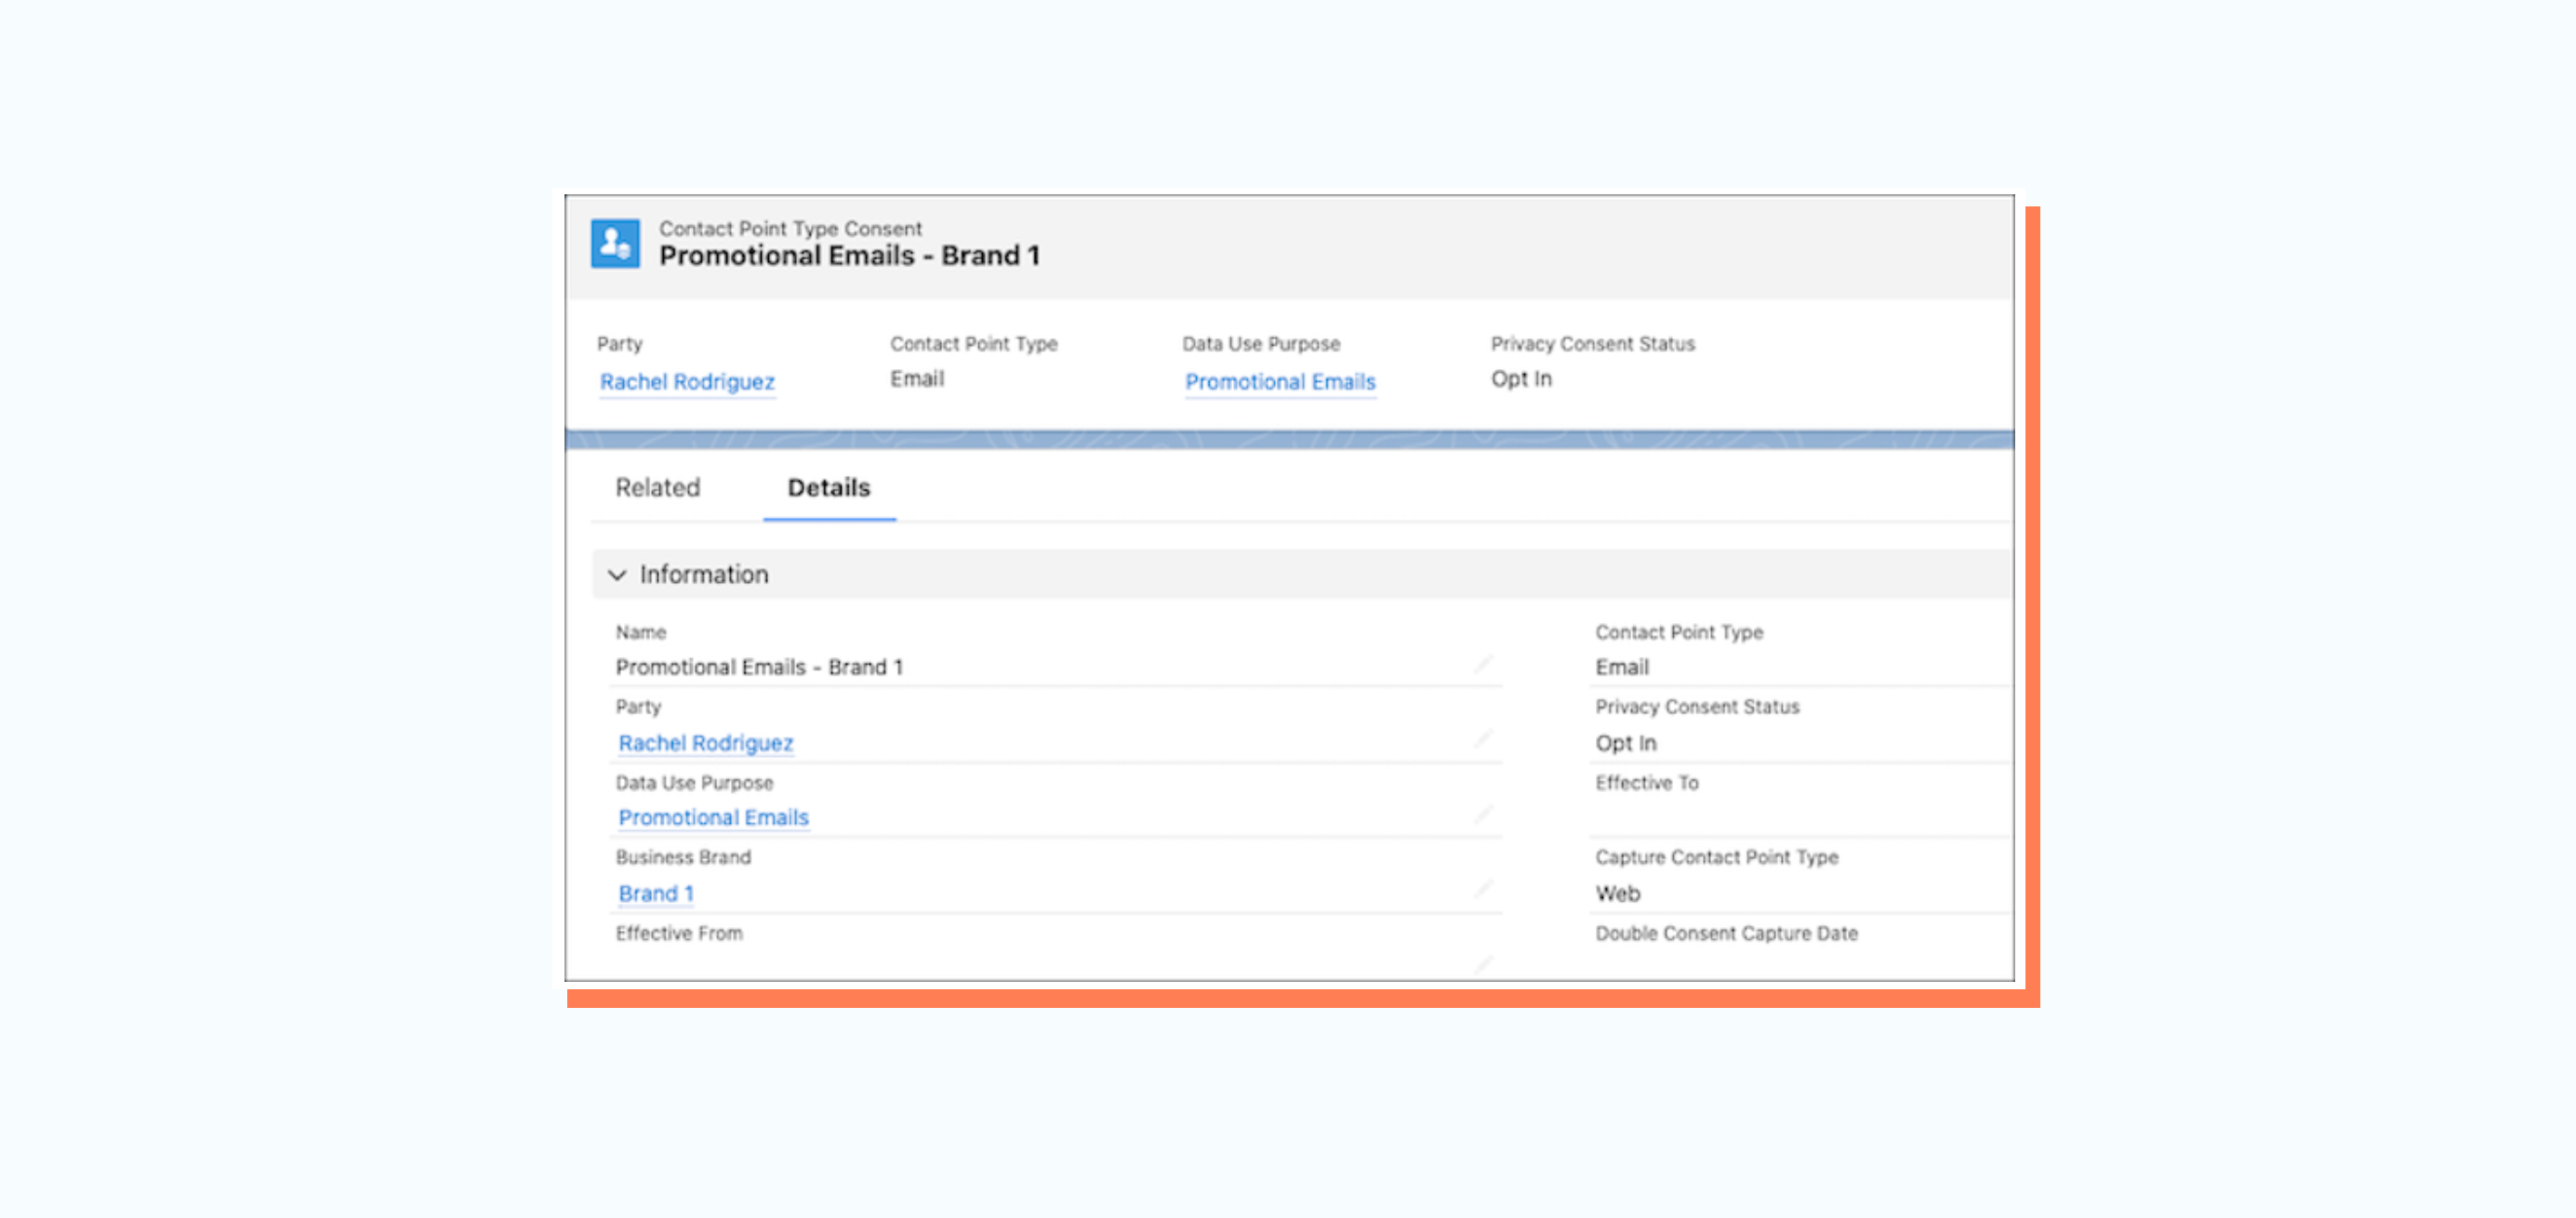
The Engagement Channel consent is handled through the Contact Point Type Consent object. Organizations can use these records to specify consent preferences for different contact methods, such as email or phone.
Contact Point Consent
The decision on whether a customer wishes to be contacted is managed via the Contact Point Consent object, which sets consent for specific contact points.
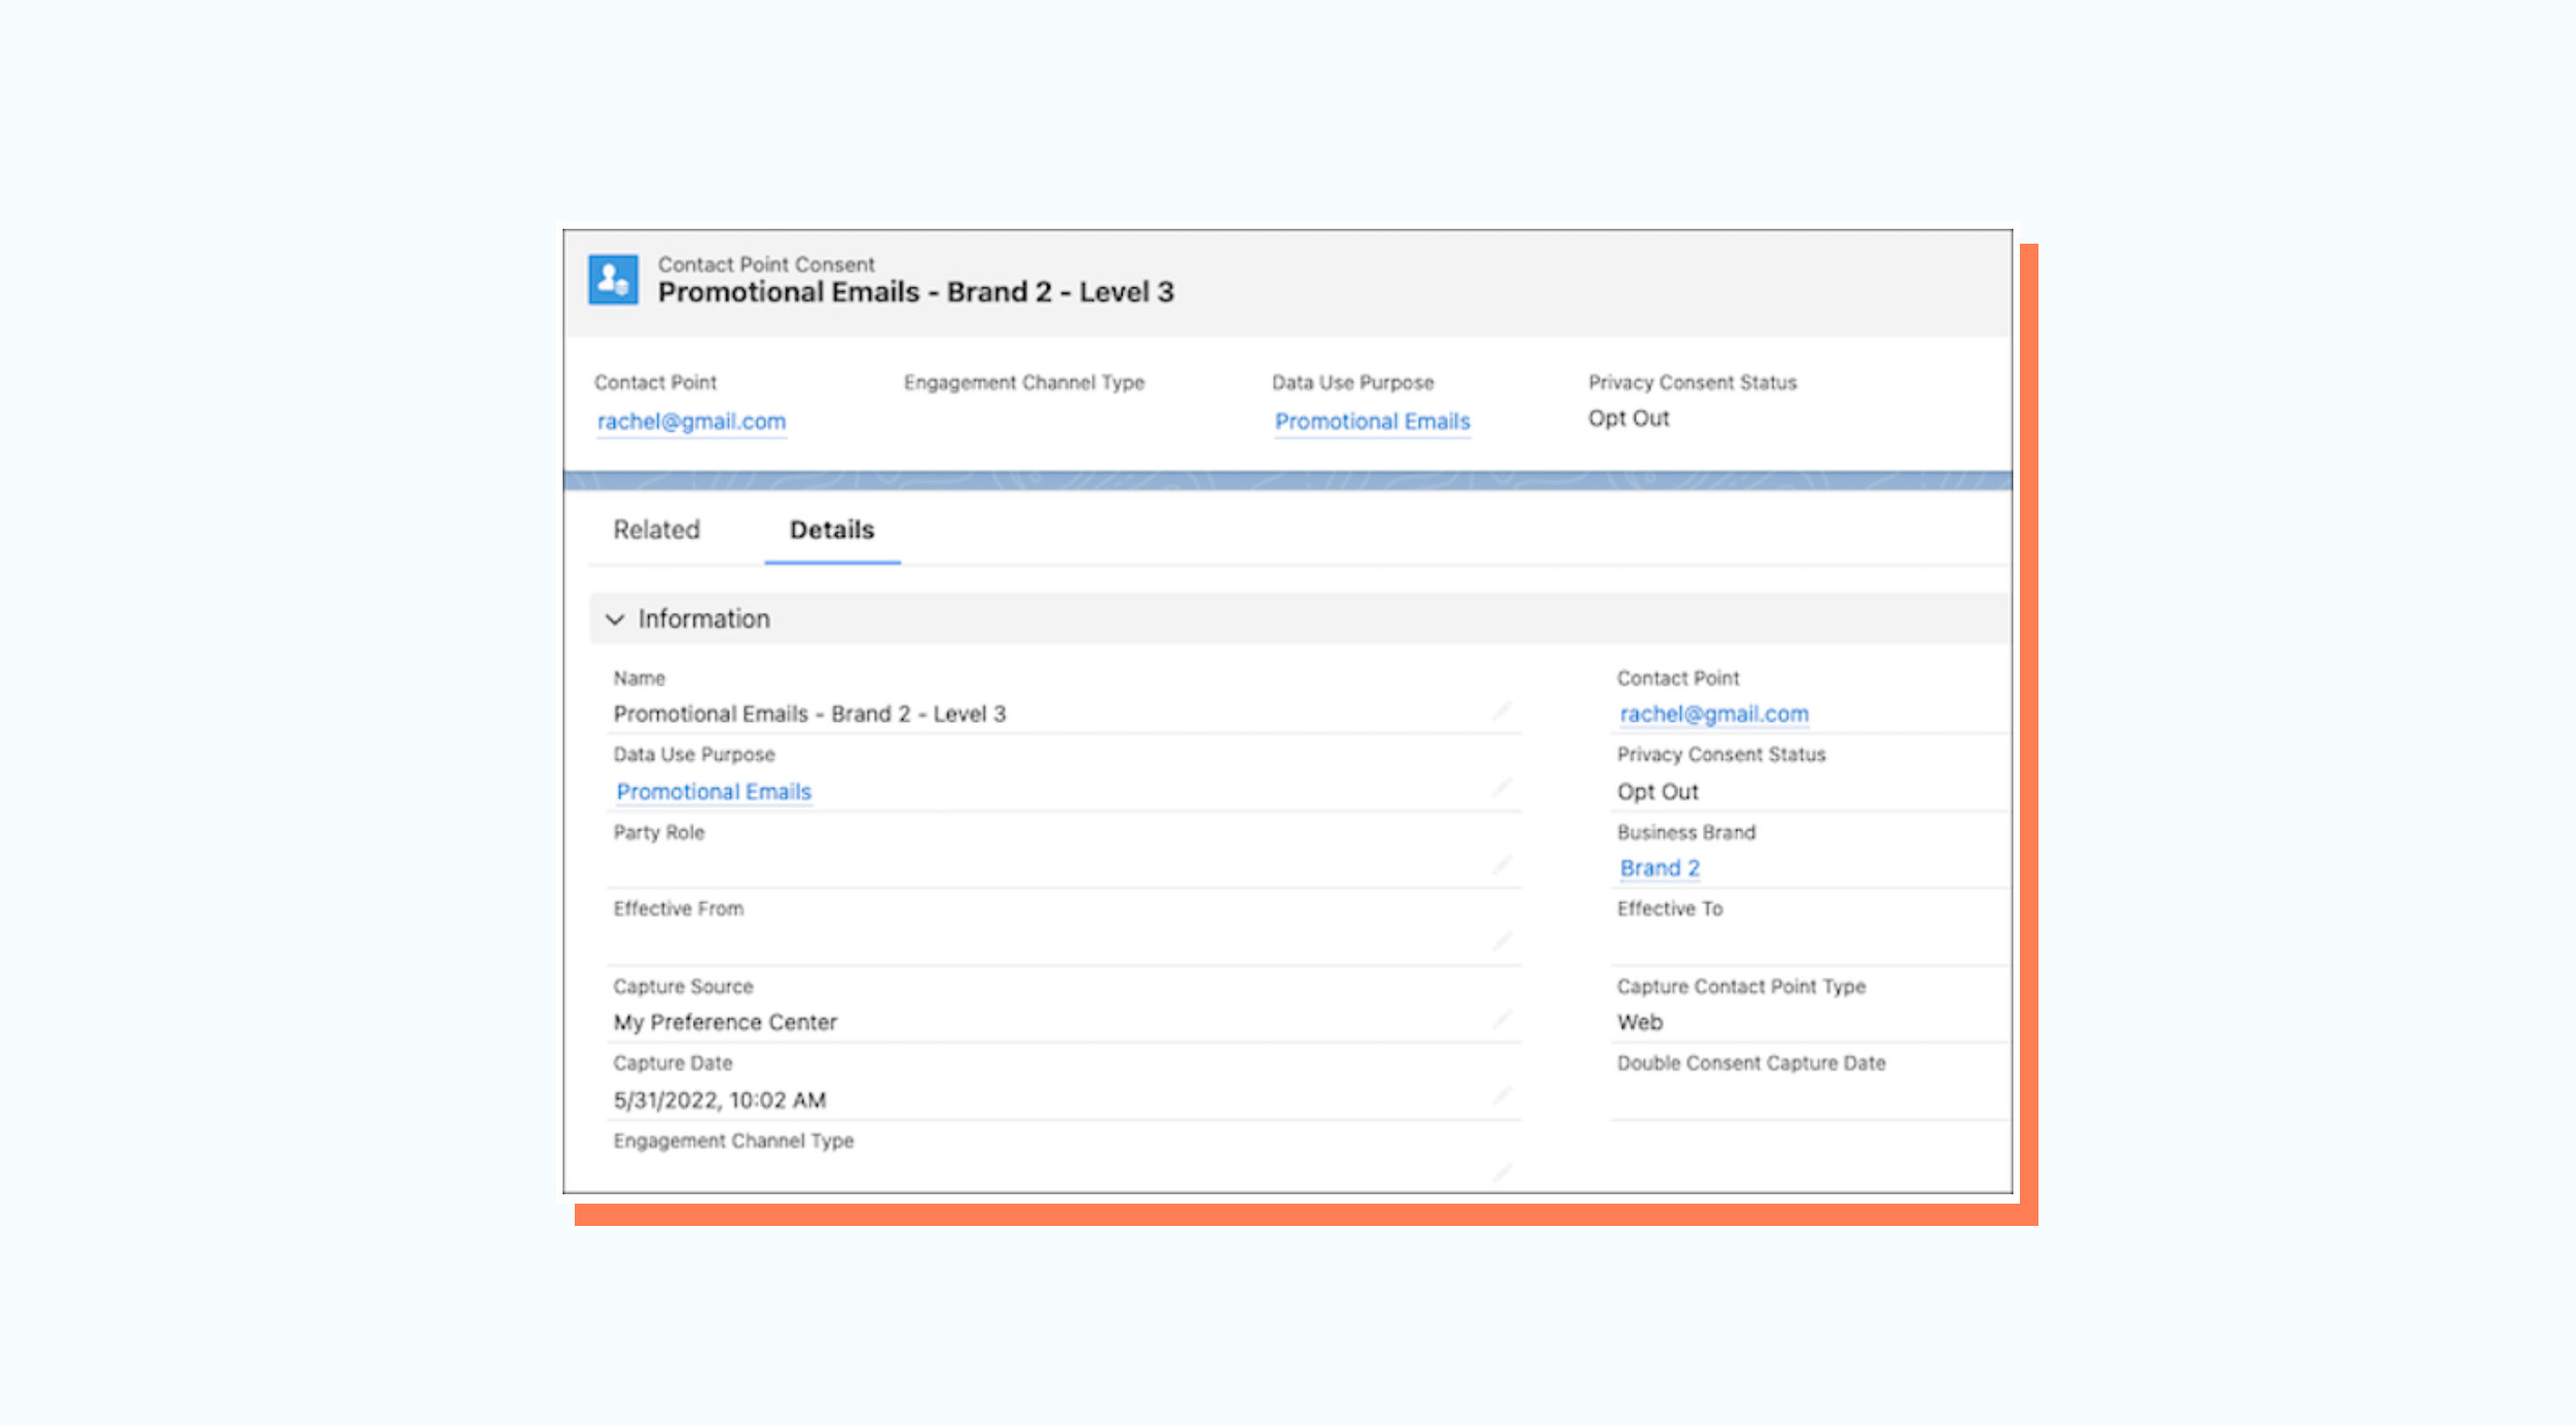
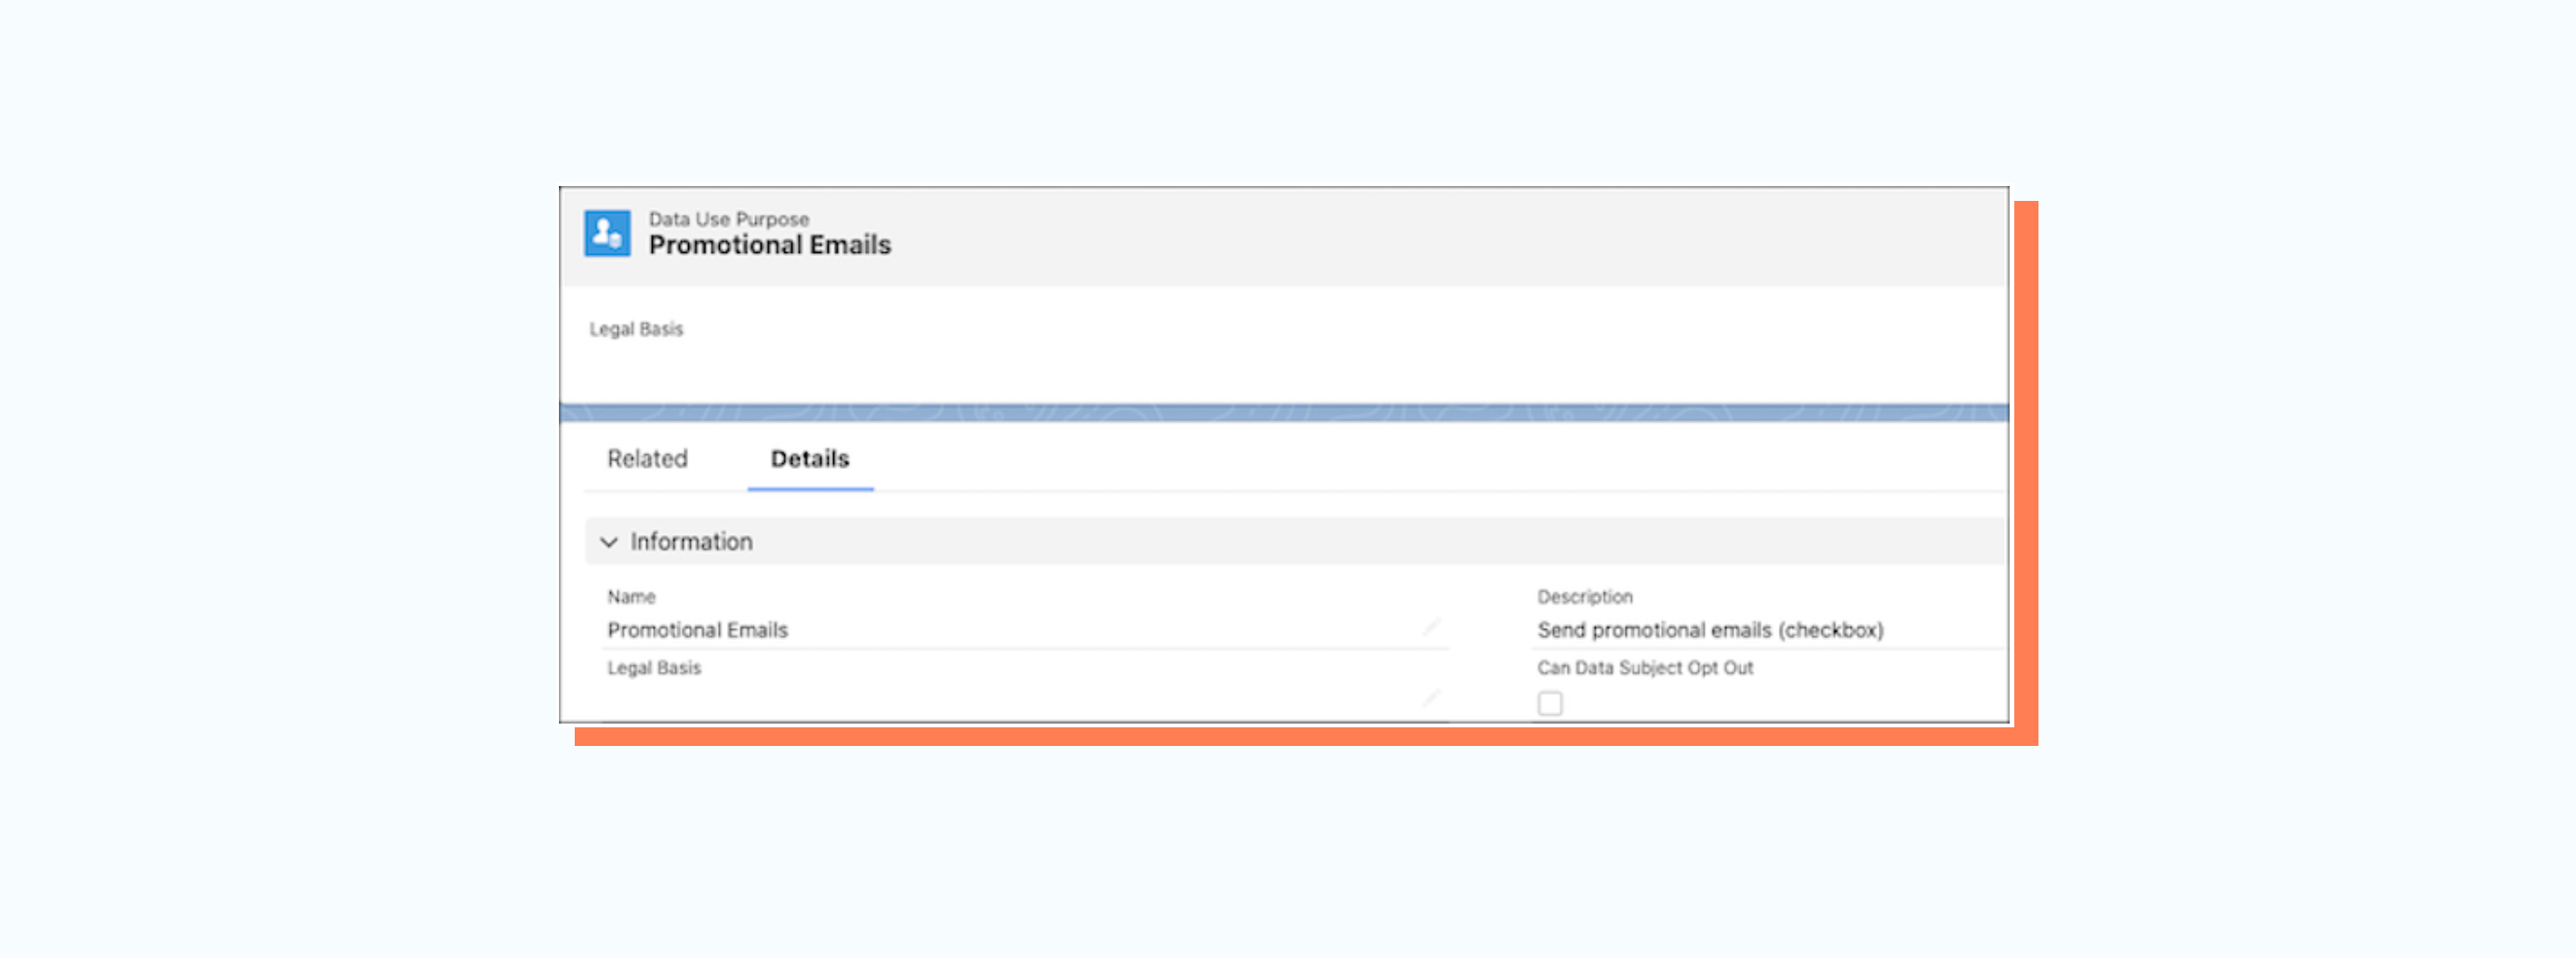
Data Use Purpose
The Data Use Purpose object records consent according to the reason for communication, such as:
- Legal reasons like recall notices
- Marketing activities like weekly newsletters
- Services like warranty support
Read more about Salesforce Consent Data Models here.
How To Configure Salesforce Consent Data Model In Marketing Cloud
Follow the steps below to configure the Salesforce Consent Data Model to manage consent preferences in Salesforce Marketing Cloud Engagement.
Step 1: Connect Consent Data To Marketing Cloud
Use Marketing Cloud Connect to synchronize consent-related objects to Marketing Cloud in the following order.
- Contact and User
- Business Brand, Data Use Purpose, and Individual
- Contact Point Email, Contact Point Phone, and Contact Point Address
- Contact Point Consent and Contact Point Type Consent
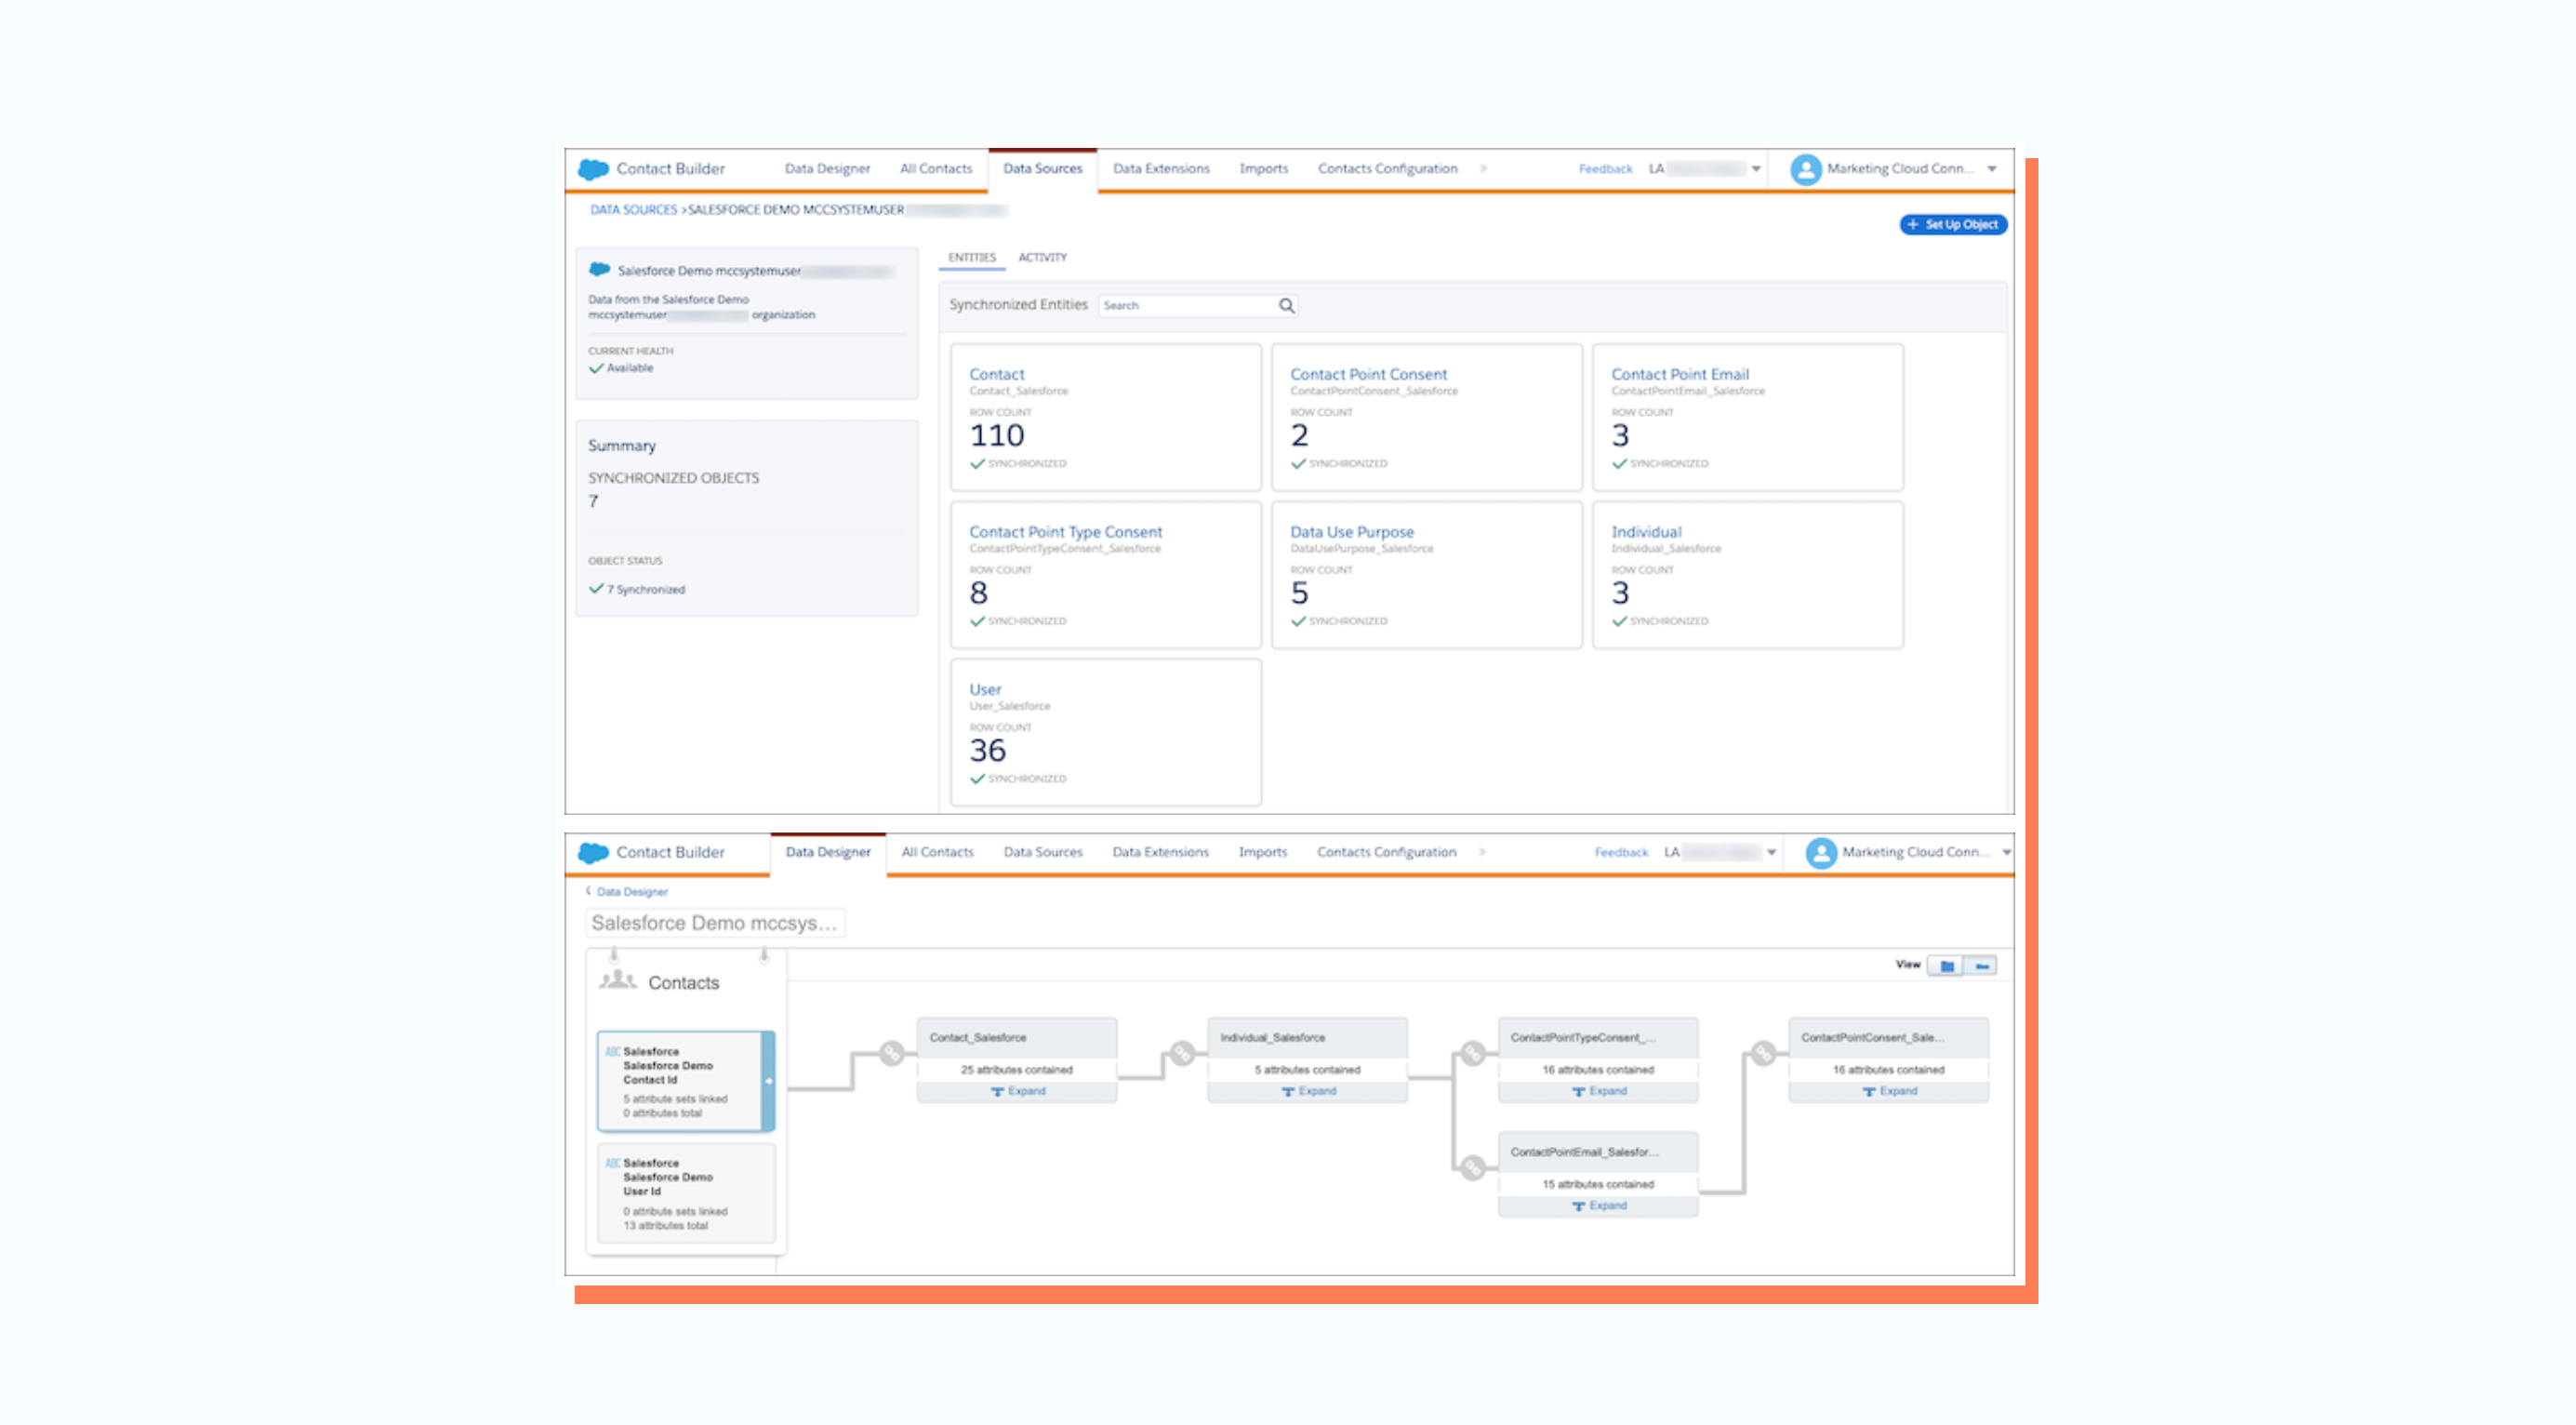
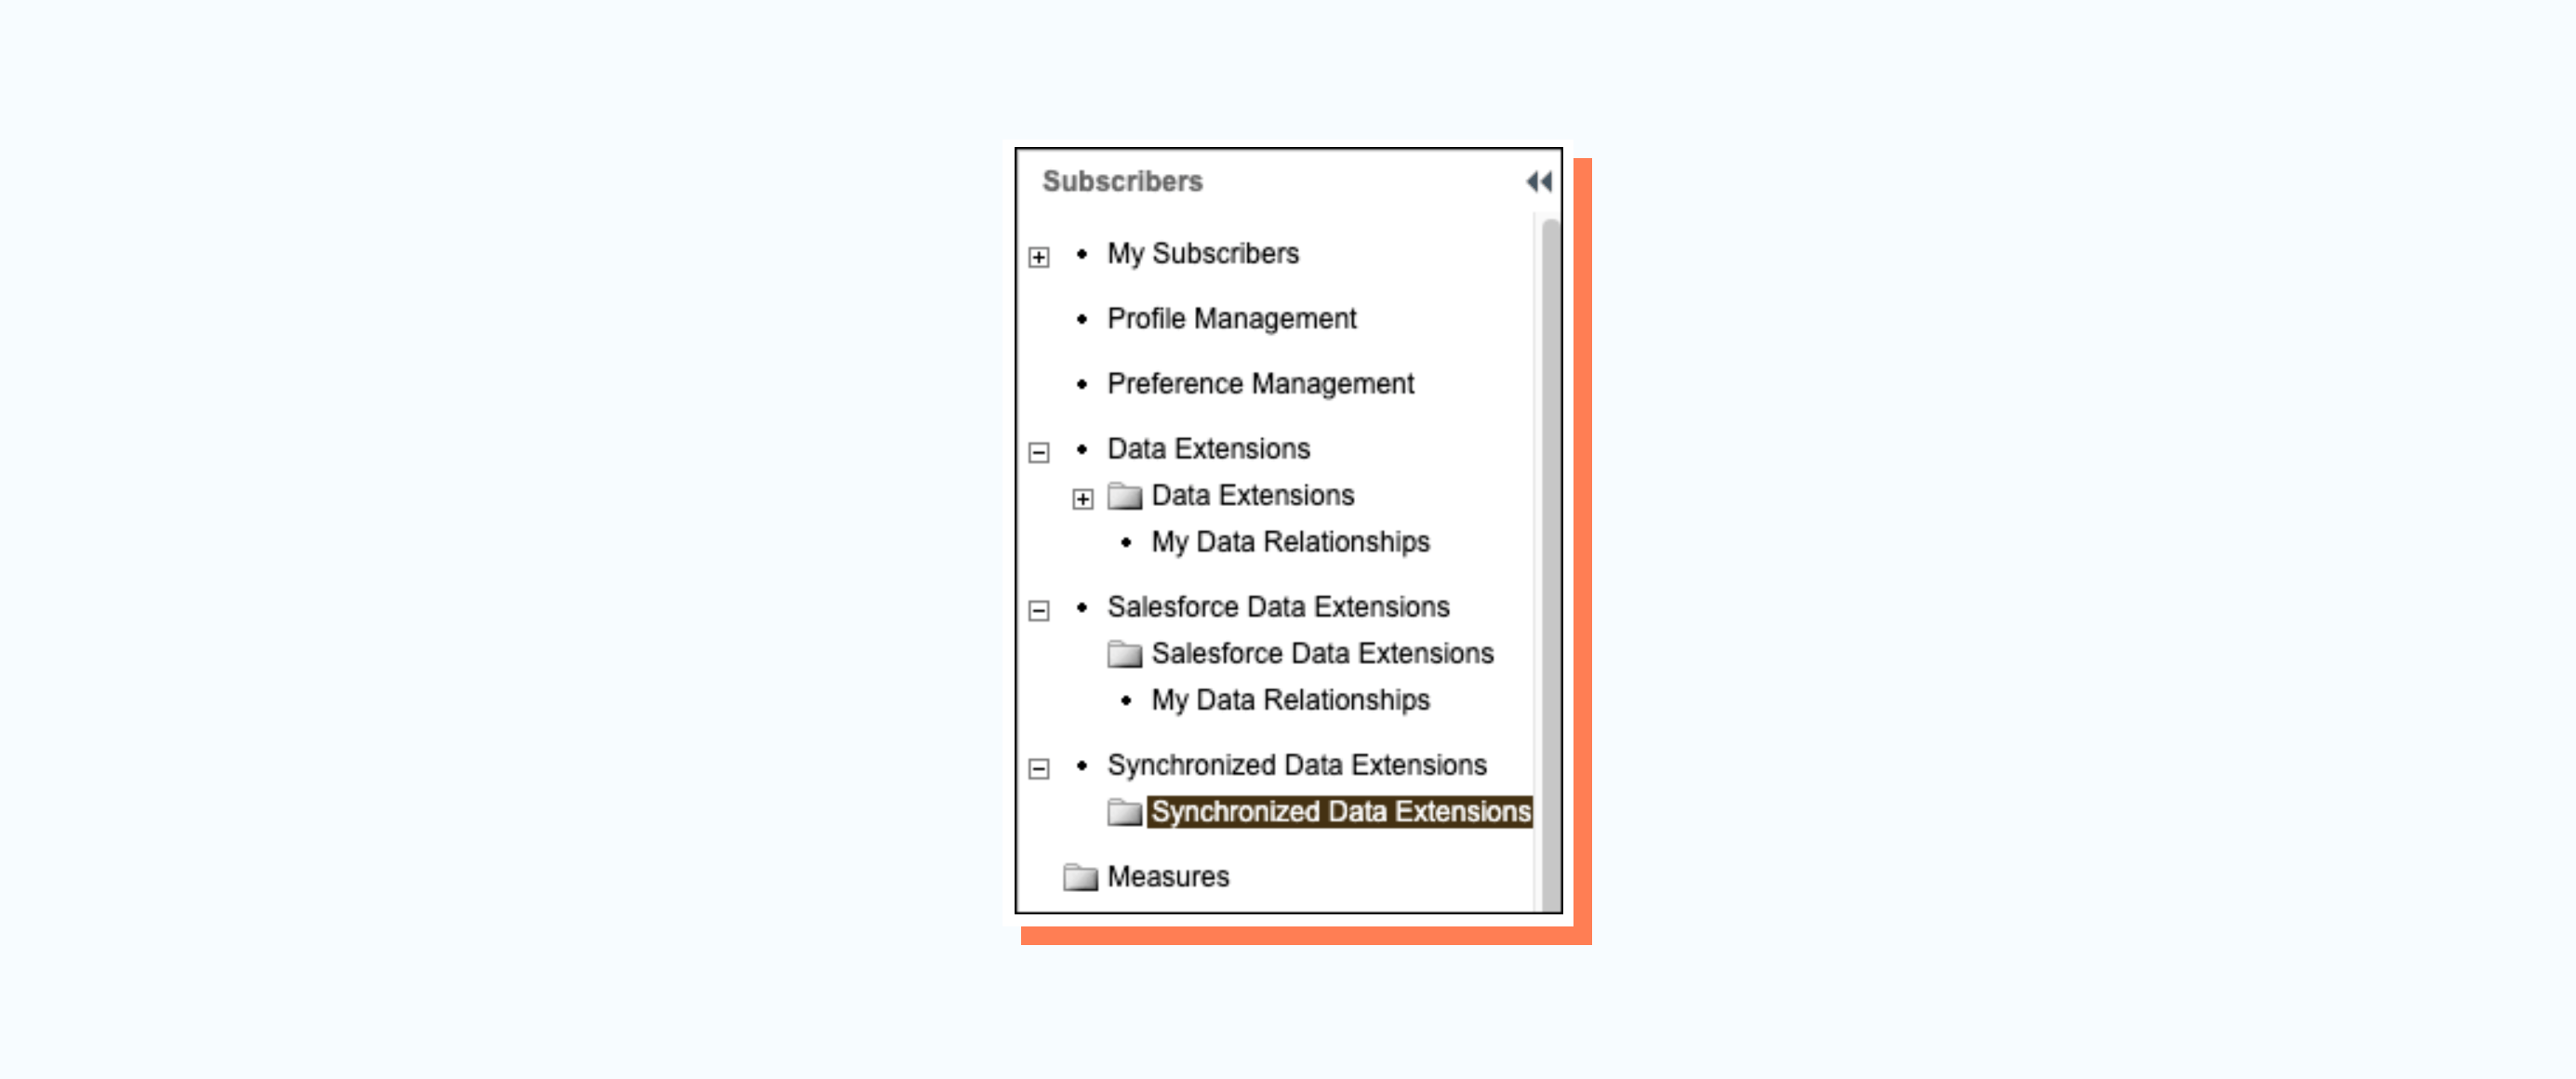
The synchronized data will appear in the local Synchronized Data Extension folder.
Step 2: Connect Consent Data To Subscribers In The Marketing Cloud
Using Brand as a filter, create a query that joins the subscriber’s contact ID with contact point consent records. For example:
| Select c.Id, c.Email, cp.EmailAddress, cpc.Name, cpc.PrivacyConsentStatus From Contact_Salesforce c Join Individual_Salesforce i On c.IndividualId = i.Id Join ContactPointEmail_Salesforce cp On i.Id = cp.ParentId Join ContactPointConsent_Salesforce cpc On cp.Id = cpc.ContactPointId |
After creating the query, determine how to make the information available according to your business requirements. For example, organizations can update or create an automation in Automation Studio and run these queries on a schedule.
Organizations can also write query results to a data extension in a shared folder for the required business units. If required, one can write additional queries or parameters that include the Data Use Purpose record.
Step 3: Retrieve Changes To Subscriber Status In Marketing Cloud
This step is only required to account for native changes in the Marketing Cloud feedback loop and reply mail management processes.
Start by identifying related consent objects in the core and update privacy preferences. The specific consent objects affected depend on how the unsubscribe was received and how the customer manages consent. For example, if a customer only manages consent by contact point type consent, that is the only object impacted.
Use ReasonUnsub to determine the consent object impacted. The default values are:
- Spam Complaint
- Unsubscribed from list details on subscriber properties dialog
- Unsubscribed by ExactTarget RMM service based on subscriber Leave or Reply email
- Unsubscribed from the Subscription Center
- Unsubscribed via Import
- Unsubscribed by Salesforce Marketing Cloud RMM service based on subscriber Leave or Reply email
- Unsubscribed by subscriber edit API call
Create an invocable action that executes the API to retrieve the Subscriber Status Event. Use complex filter parts and include the date since the last batch execution. For example:
| <Filter xsi:type="par:ComplexFilterPart" xmlns:par="http://exacttarget.com/wsdl/partnerAPI"> <LeftOperand xsi:type="par:SimpleFilterPart"> <Property>CurrentStatus</Property> <SimpleOperator>equals</SimpleOperator> <Value>Unsubscribed</Value> </LeftOperand> <LogicalOperator>AND</LogicalOperator> <RightOperand xsi:type="par:SimpleFilterPart"> <Property>CreatedDate</Property> <SimpleOperator>greaterThan</SimpleOperator> <DateValue>2011-04-07T19:58:33.434707Z</DateValue> </RightOperand> </Filter> |
To filter on a specific ReasonUnsub value, change the filter to use a different Simple Operator. For example:
| <Filter xsi:type="par:ComplexFilterPart" xmlns:par="http://exacttarget.com/wsdl/partnerAPI"> <LeftOperand xsi:type="par:SimpleFilterPart"> <Property>ReasonUnsub</Property> <SimpleOperator>like</SimpleOperator> <Value>Unsubscribed</Value> </LeftOperand> <LogicalOperator>AND</LogicalOperator> <RightOperand xsi:type="par:SimpleFilterPart"> <Property>CreatedDate</Property> <SimpleOperator>greaterThan</SimpleOperator> <DateValue>2022-01-01T19:58:33.434707Z</DateValue> </RightOperand> </Filter> |
Use an API call to create a schedule-triggered flow to retrieve unsubscribe events from Marketing Cloud for the last 24 hours.
- Pick a date and time for the first run of the flow
- Schedule the flow to run daily
To review all subscribers with an unsubscribed status in the list, create a scheduled-triggered flow to perform weekly refreshes. An invocable action can be used to perform the work of both executions. For example:
| <Filter xsi:type="par:ComplexFilterPart" xmlns:par="http://exacttarget.com/wsdl/partnerAPI"> <LeftOperand xsi:type="par:SimpleFilterPart"> <Property>CurrentStatus</Property> <SimpleOperator>equals</SimpleOperator> <Value>Held</Value> </LeftOperand> <LogicalOperator>AND</LogicalOperator> <RightOperand xsi:type="par:SimpleFilterPart"> <Property>CreatedDate</Property> <SimpleOperator>between</SimpleOperator> <DateValue>2009-01-01T19:58:33.434707Z</DateValue> <DateValue>2010-04-07T19:58:33.434707Z</DateValue> </RightOperand> </Filter> |
Conclusion
It's essential to tailor your consent management strategies to your target audience's specific needs and legal requirements. If you still need help or want to learn more about customer digital experiences, our experts at Axelerant can help.
We can ensure that your marketing practices align with the applicable regulations and respect the privacy rights of your customers.

Abhishek Tripathi, DXP Consultant
Abhi likes to contribute to society, learns new skills from Trailhead, and when away from his desk, he spends quality time with his kids and helps out his wife and mother. When engaged, challenged, and appreciated at work, he’s unstoppable.


Leave us a comment